Rather than posting in my 1969 Plymouth Barracuda build thread, I decided to start this thread for others who might be interested in building their own personal cooling system with similar parts but without paying retail through a manufacturer like Cool Shirt or Paragon. Basic system from either run around $500 - $700, which I’m sure discourages a lot of people who would benefit from the cooling.
I started my process by reviewing photos and specifications for Cool Shirt, Paragon, and other similar ice-cooled water systems to get an idea of how they work and what parts are required. From there, I did my best to find the actual parts they use, when I could, to see if I could either purchase the same part, purchase a quality substitute, build my own, or buy one from one of the manufacturers. I scoured the internet and local stores for parts and ended up using Amazon, ebay, and Lowe’s.
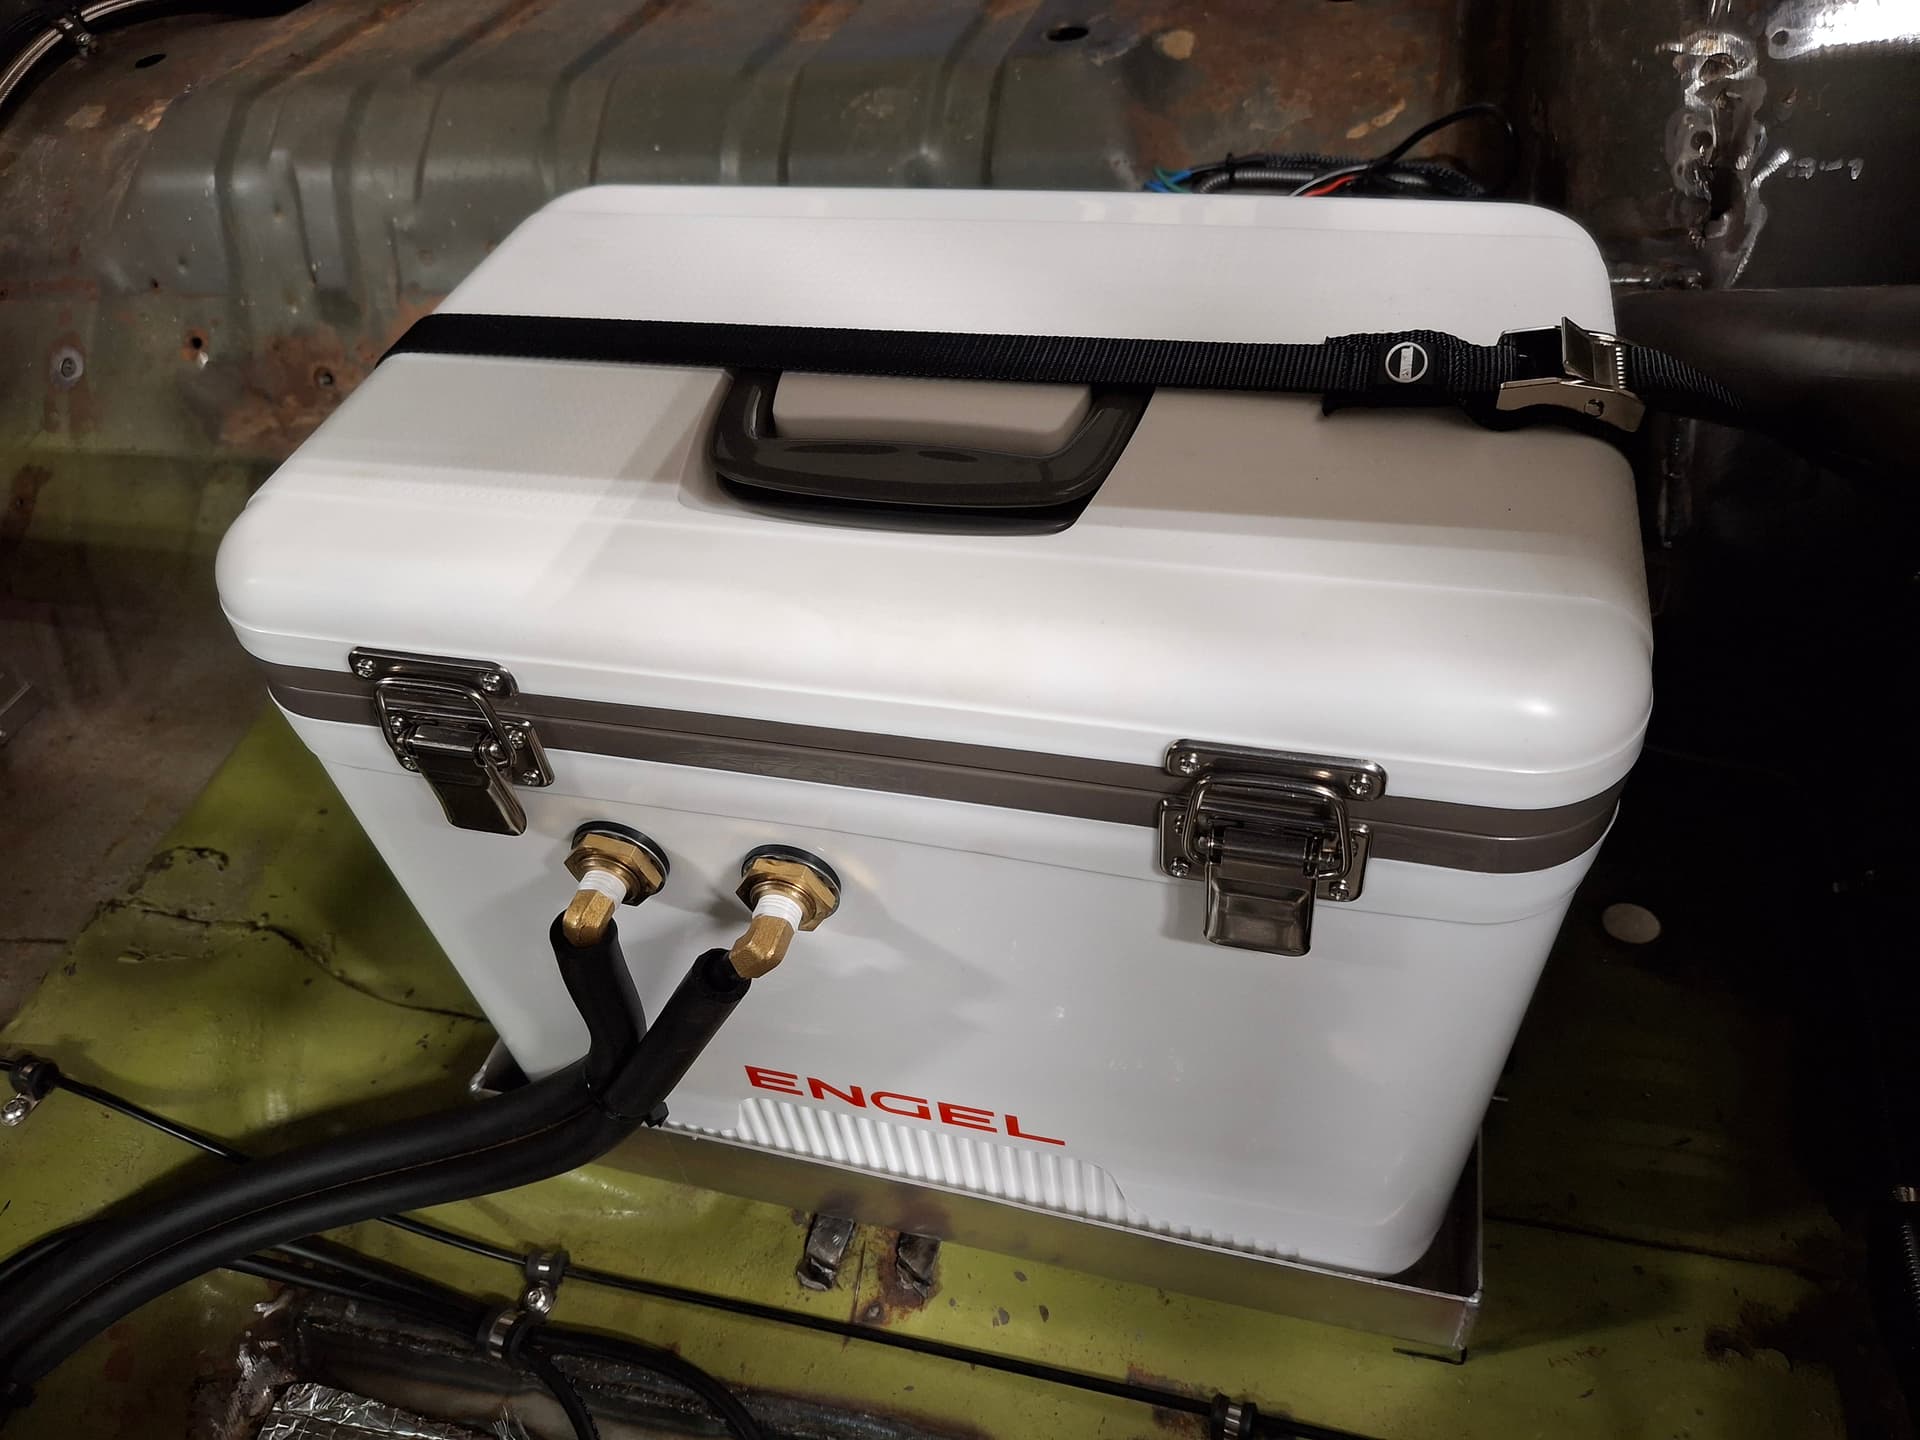
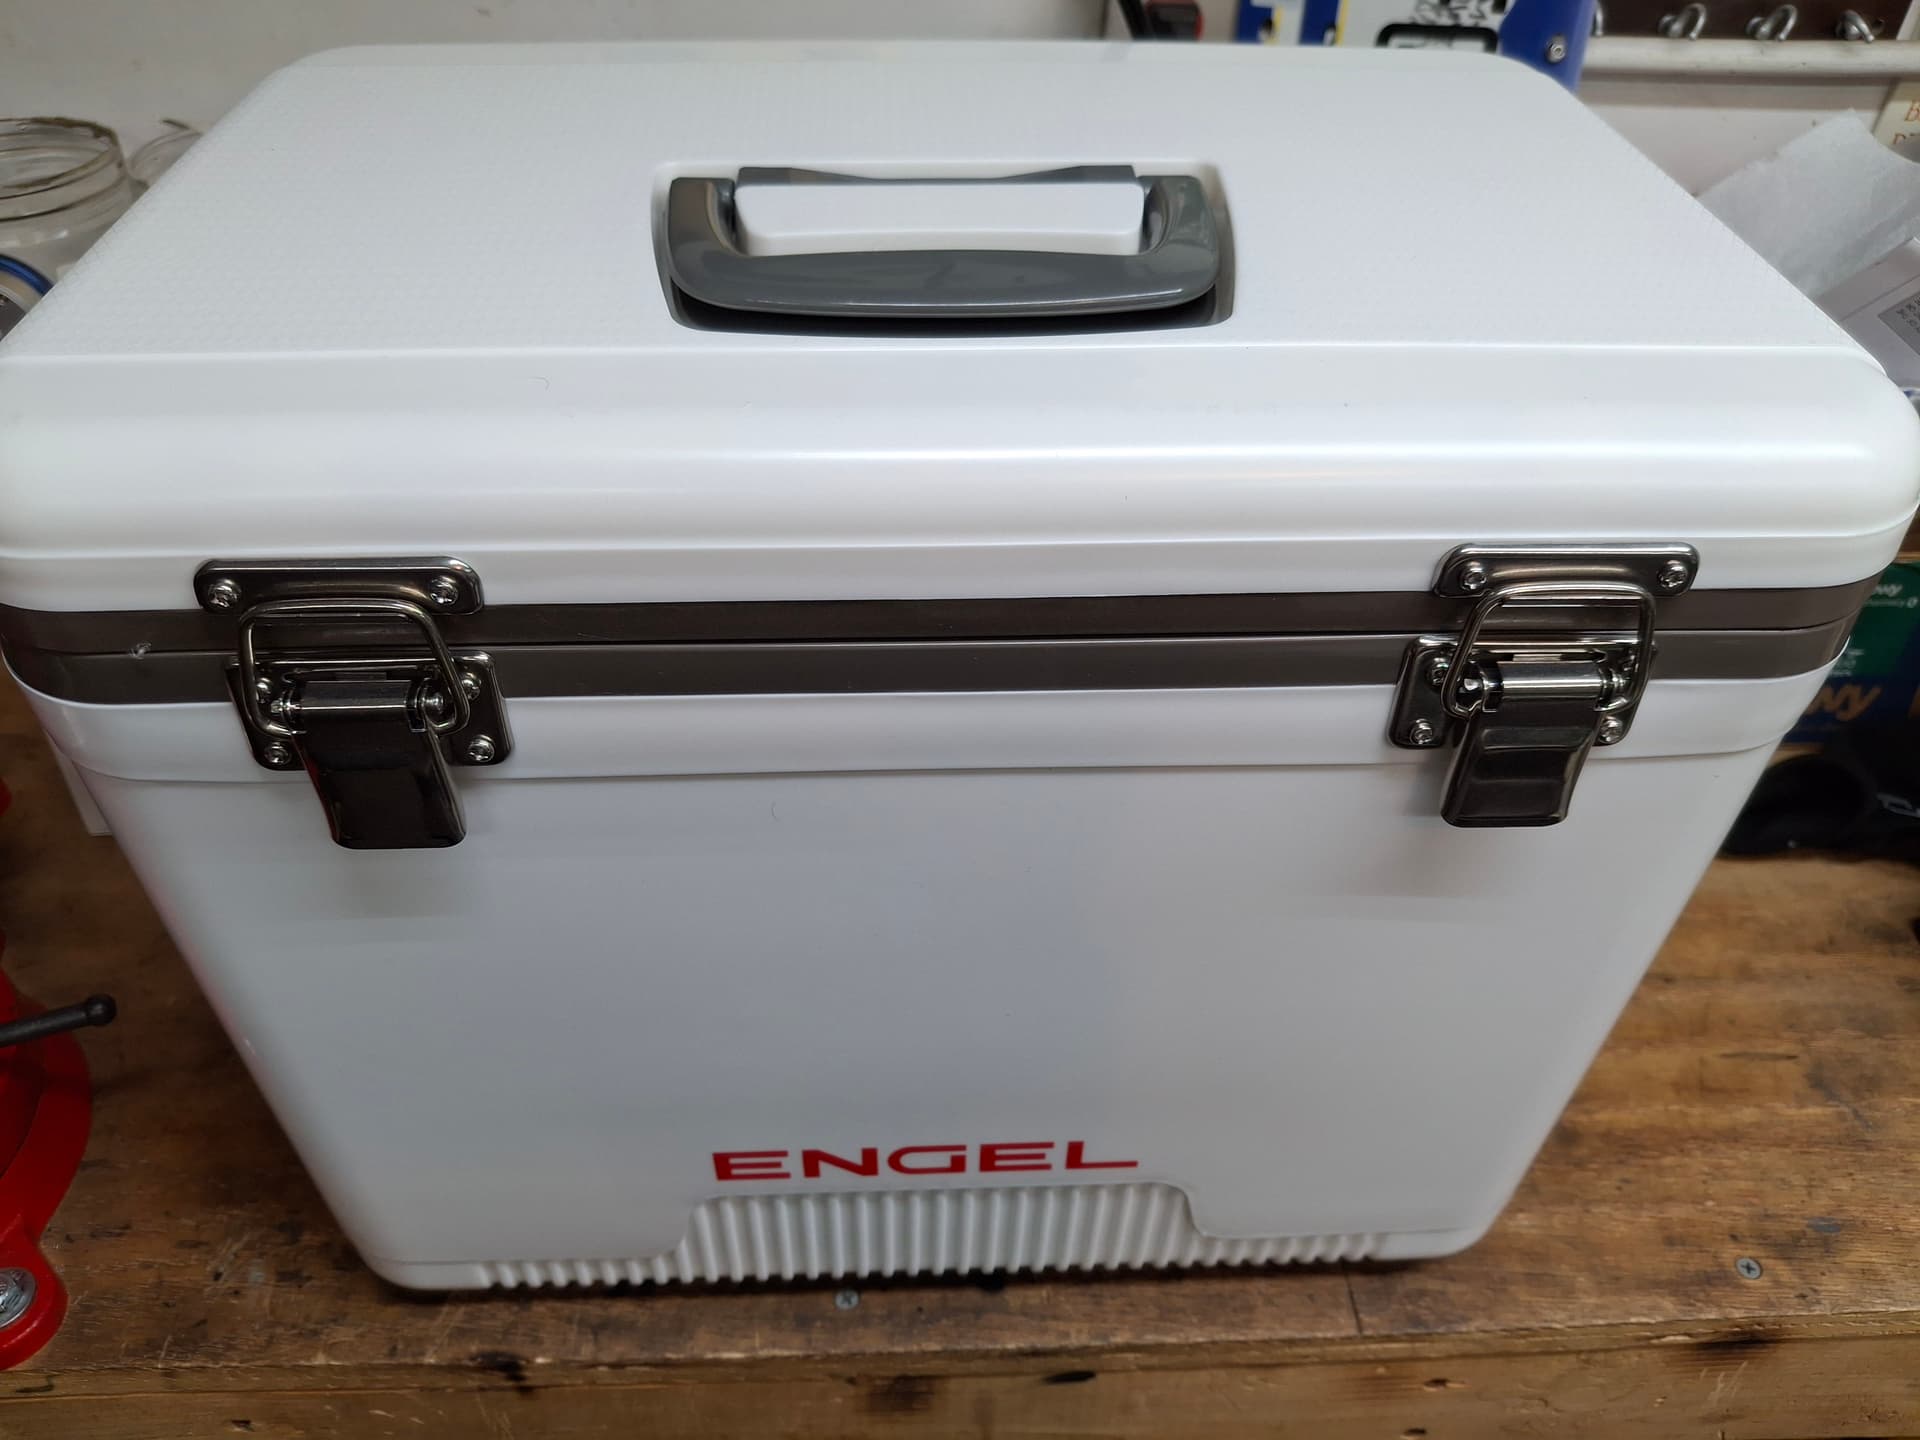
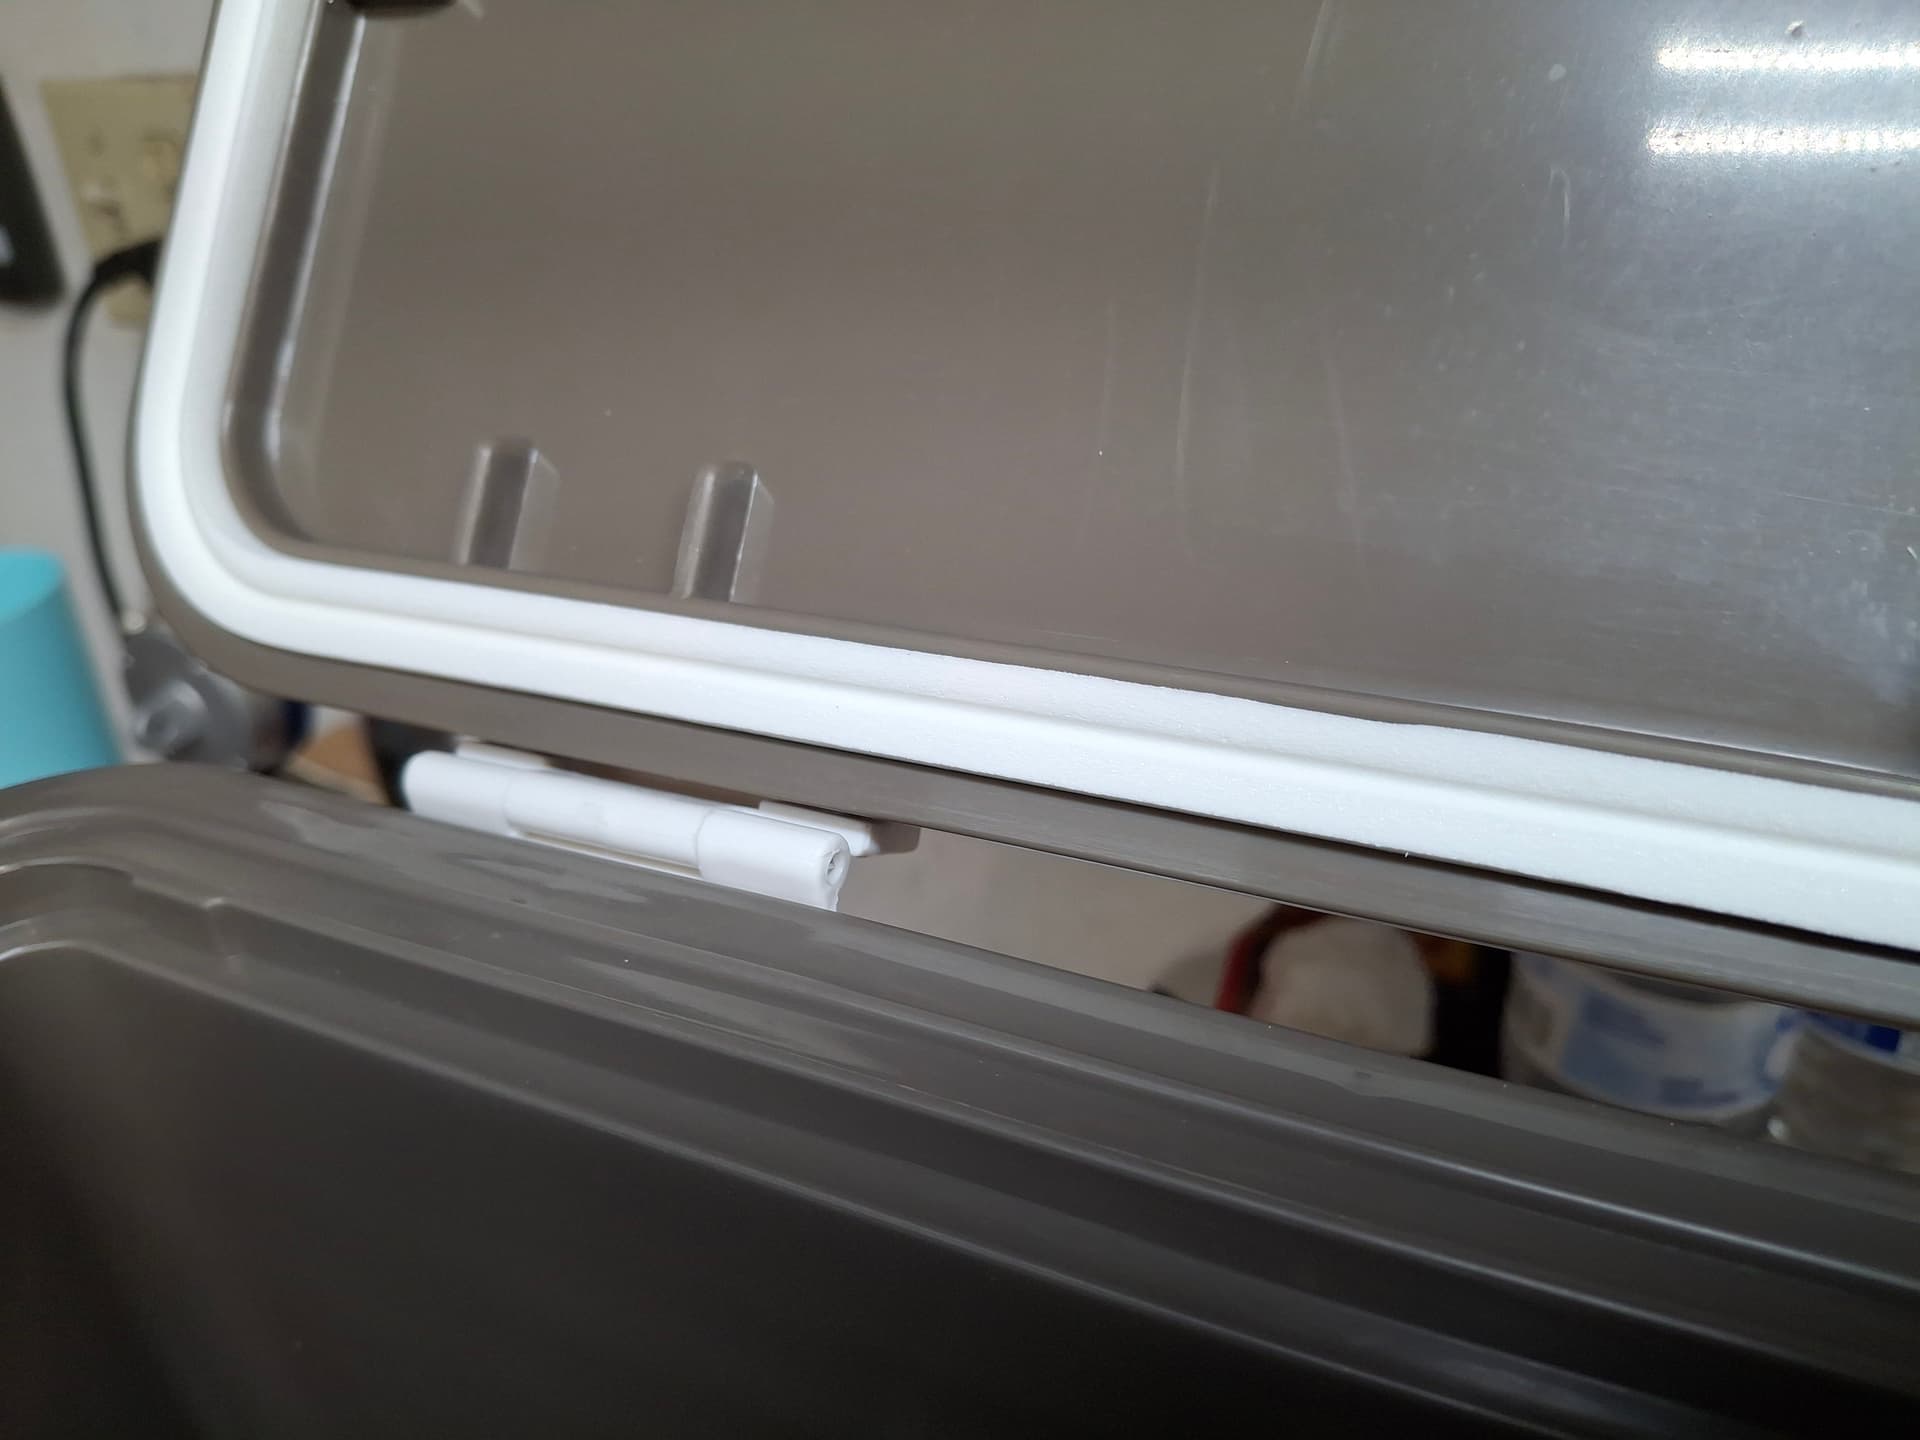
Container: Both Cool Shirt and Paragon use an Engel 19-quart cooler. The main reason appears to be a double-latched lid with a tight weatherstrip seal. I couldn’t find one locally at any sporting goods or box stores, and Amazon had the best price and color selection at $89. Since sun will be beating down on the container through the Barracuda’s big rear window, I went with white: Amazon.com : Engel UC19 19qt Leak-Proof, Air Tight, Drybox Cooler and Small Hard Shell Lunchbox for Men and Women in White : Coolers : Sports & Outdoors
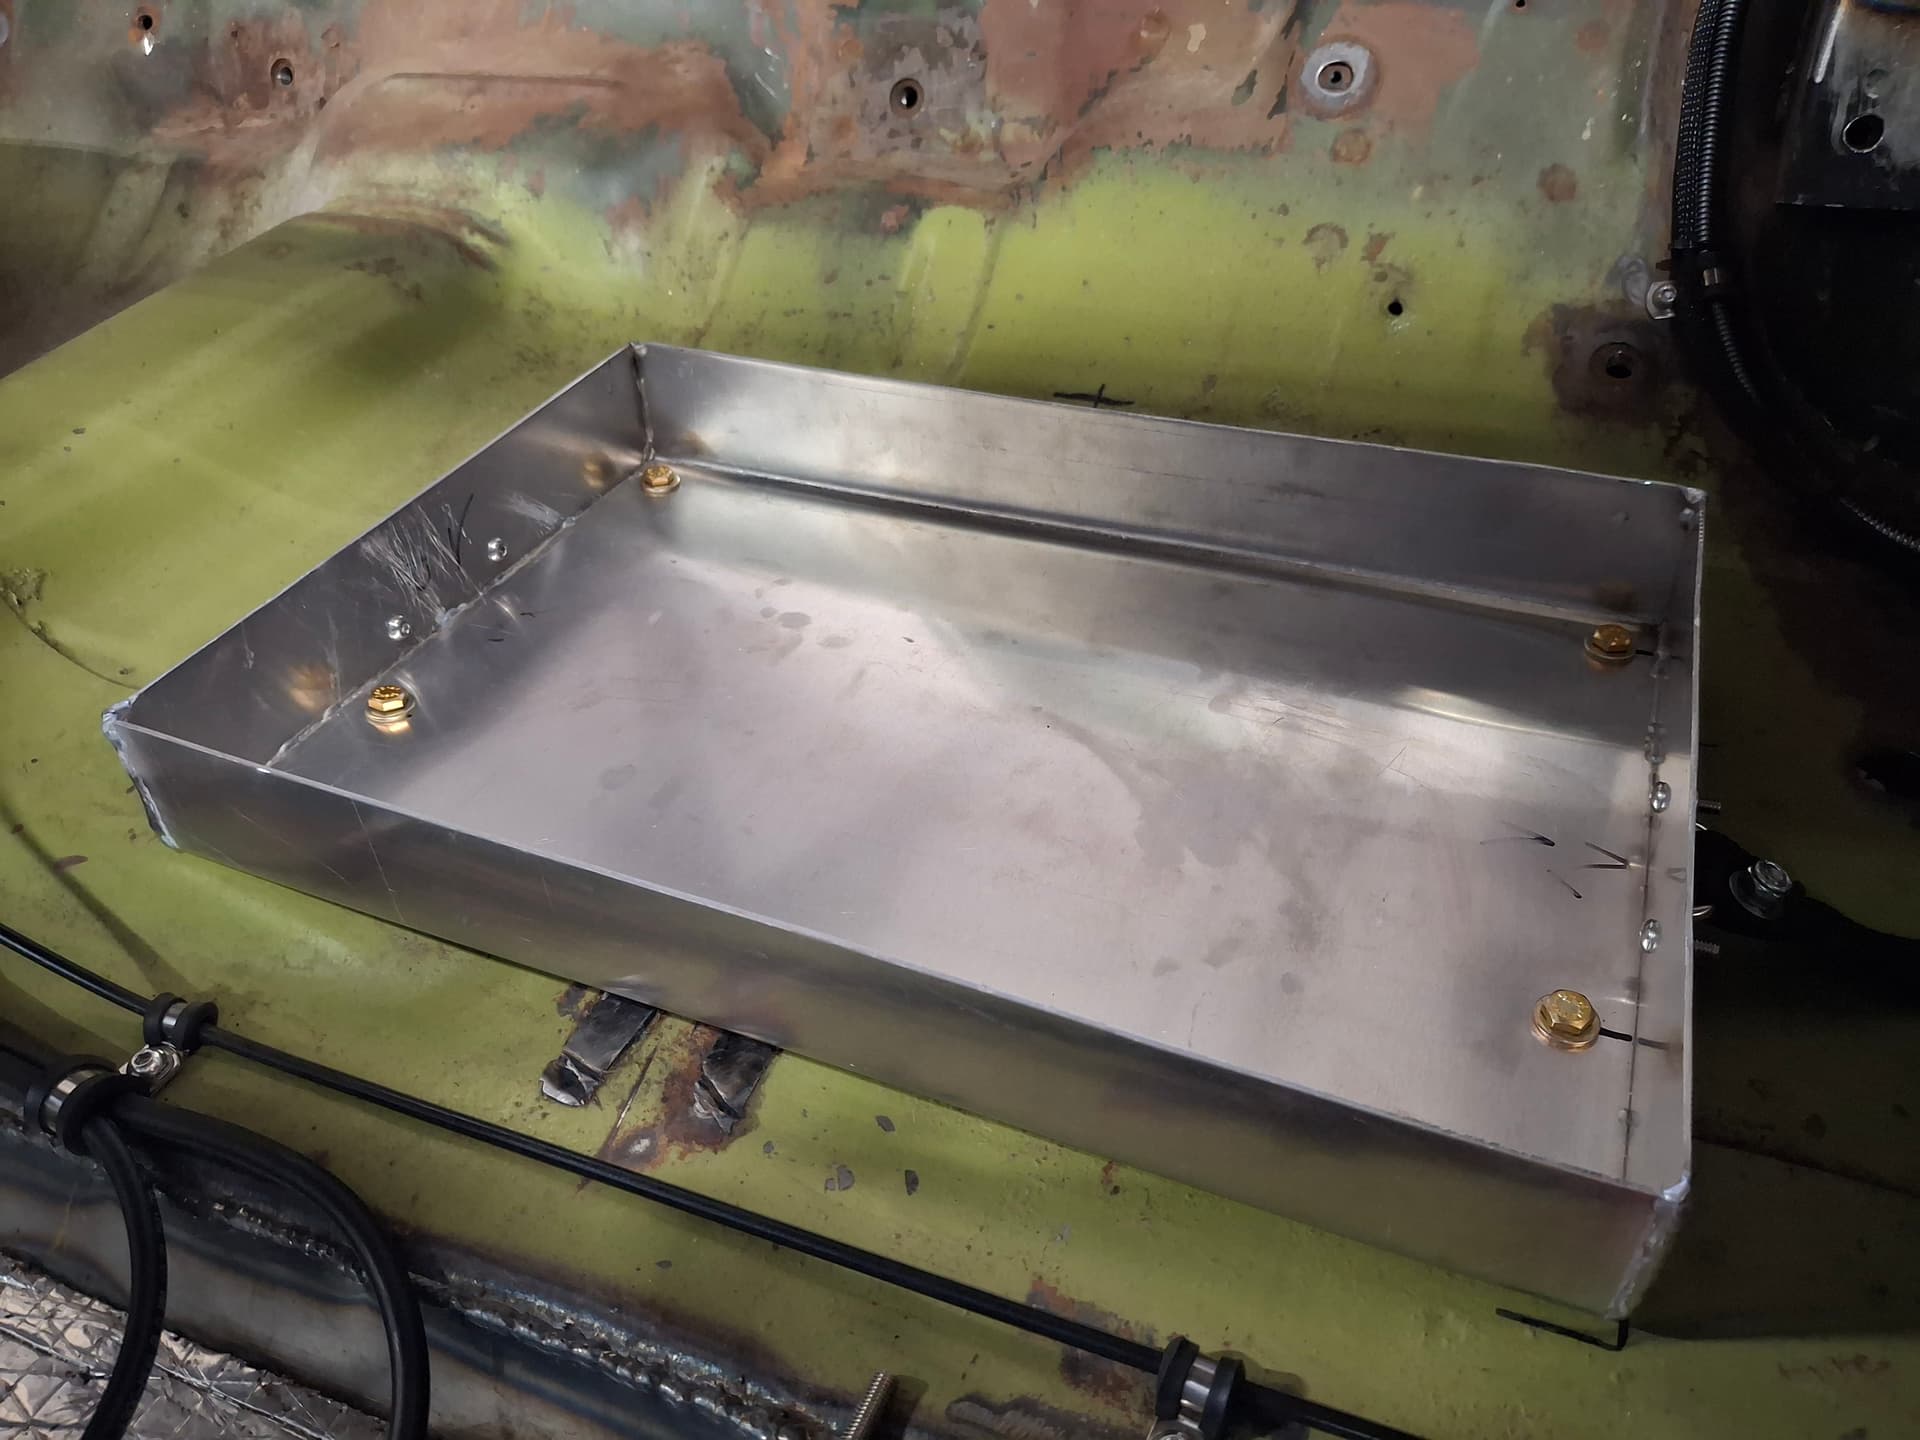
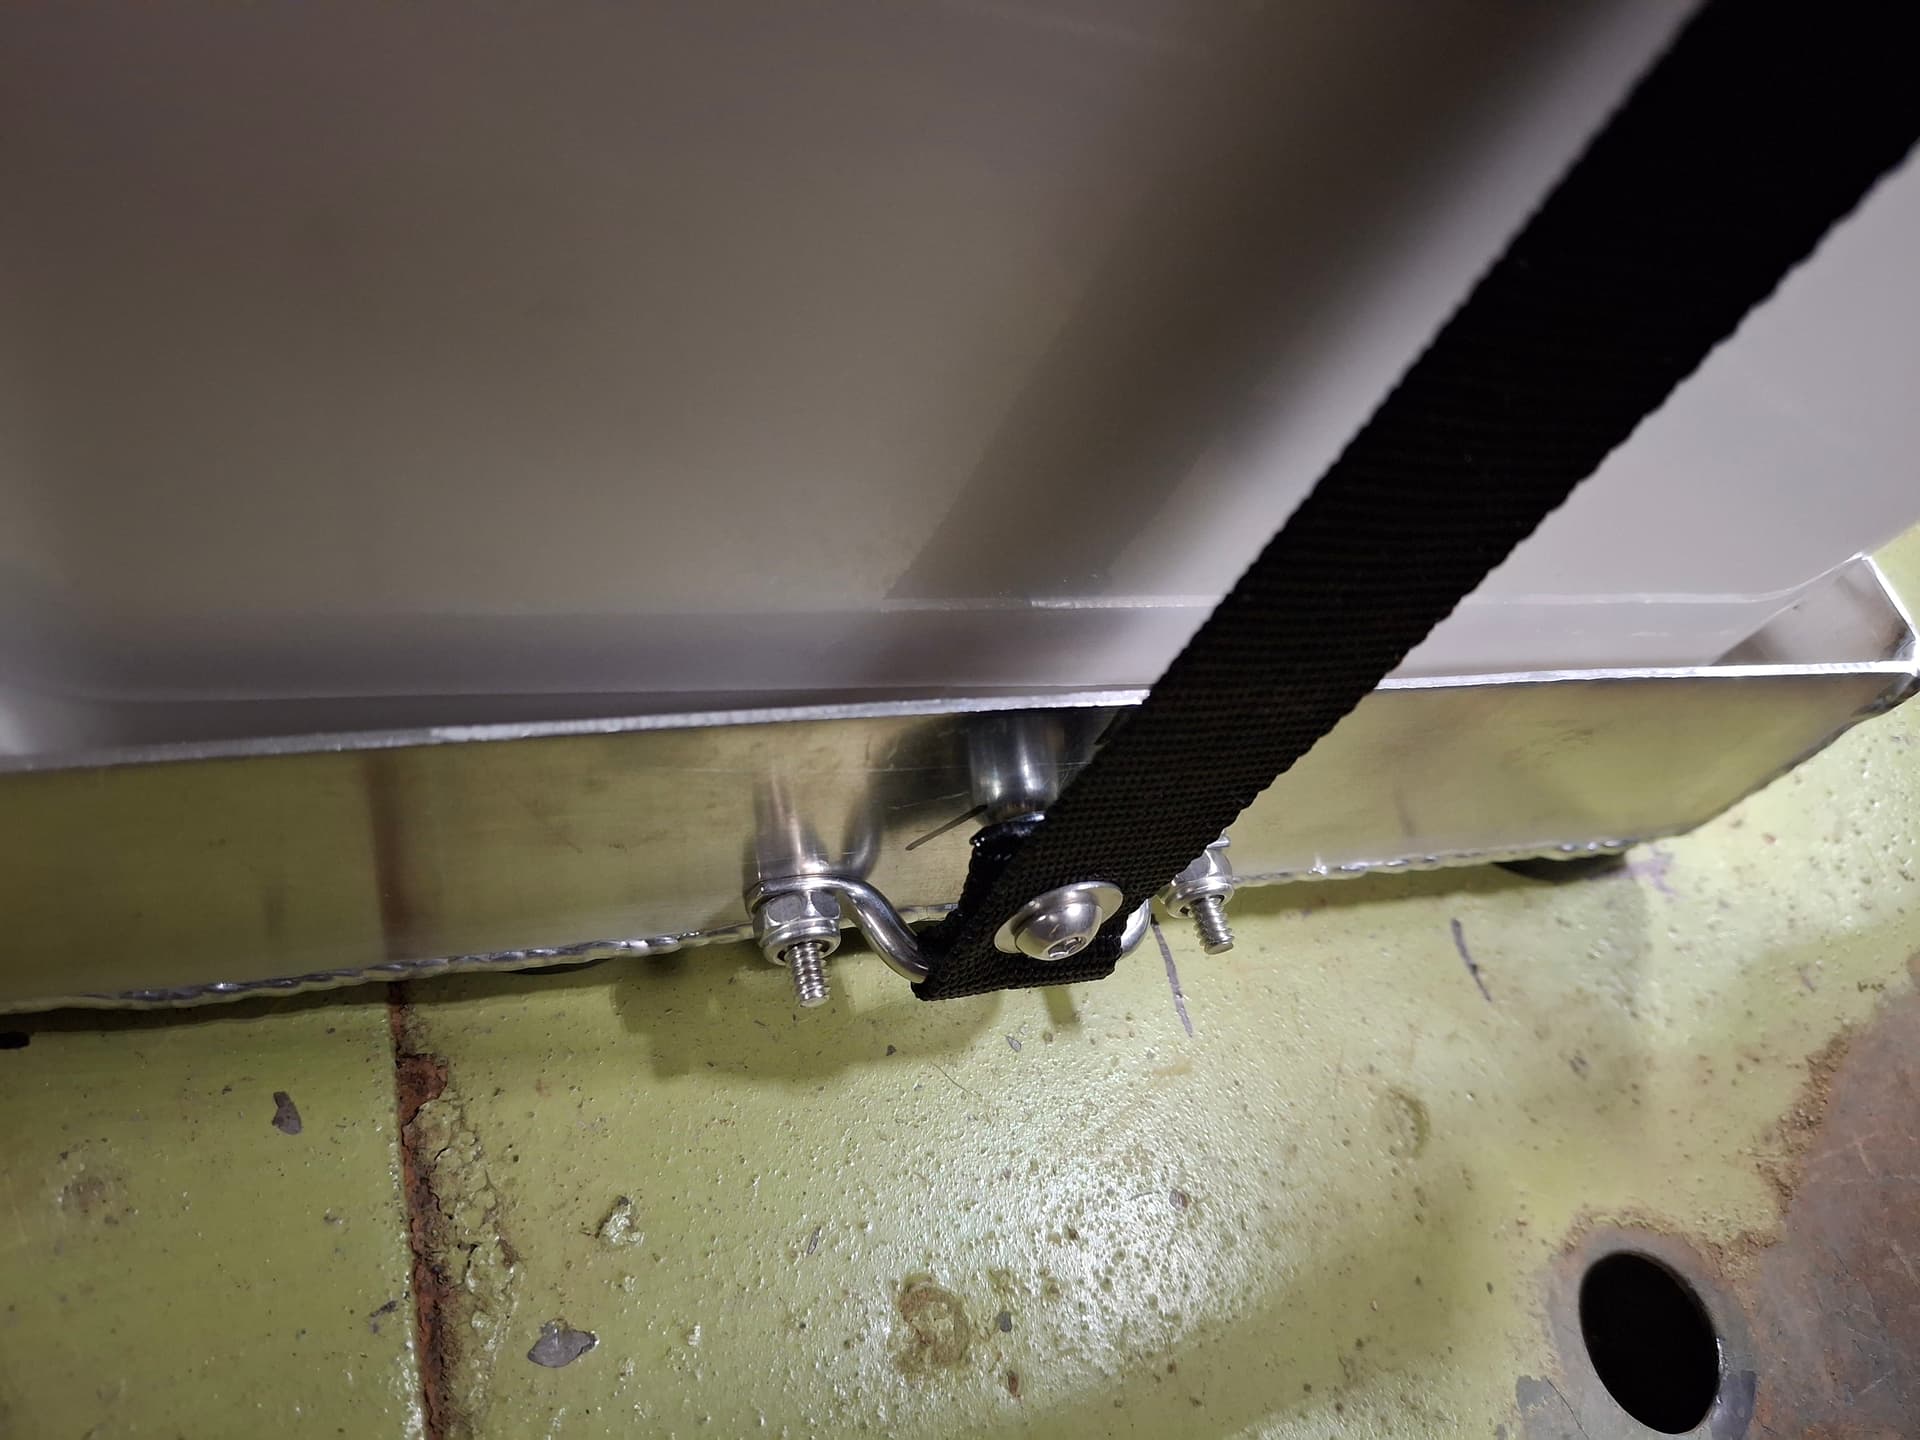
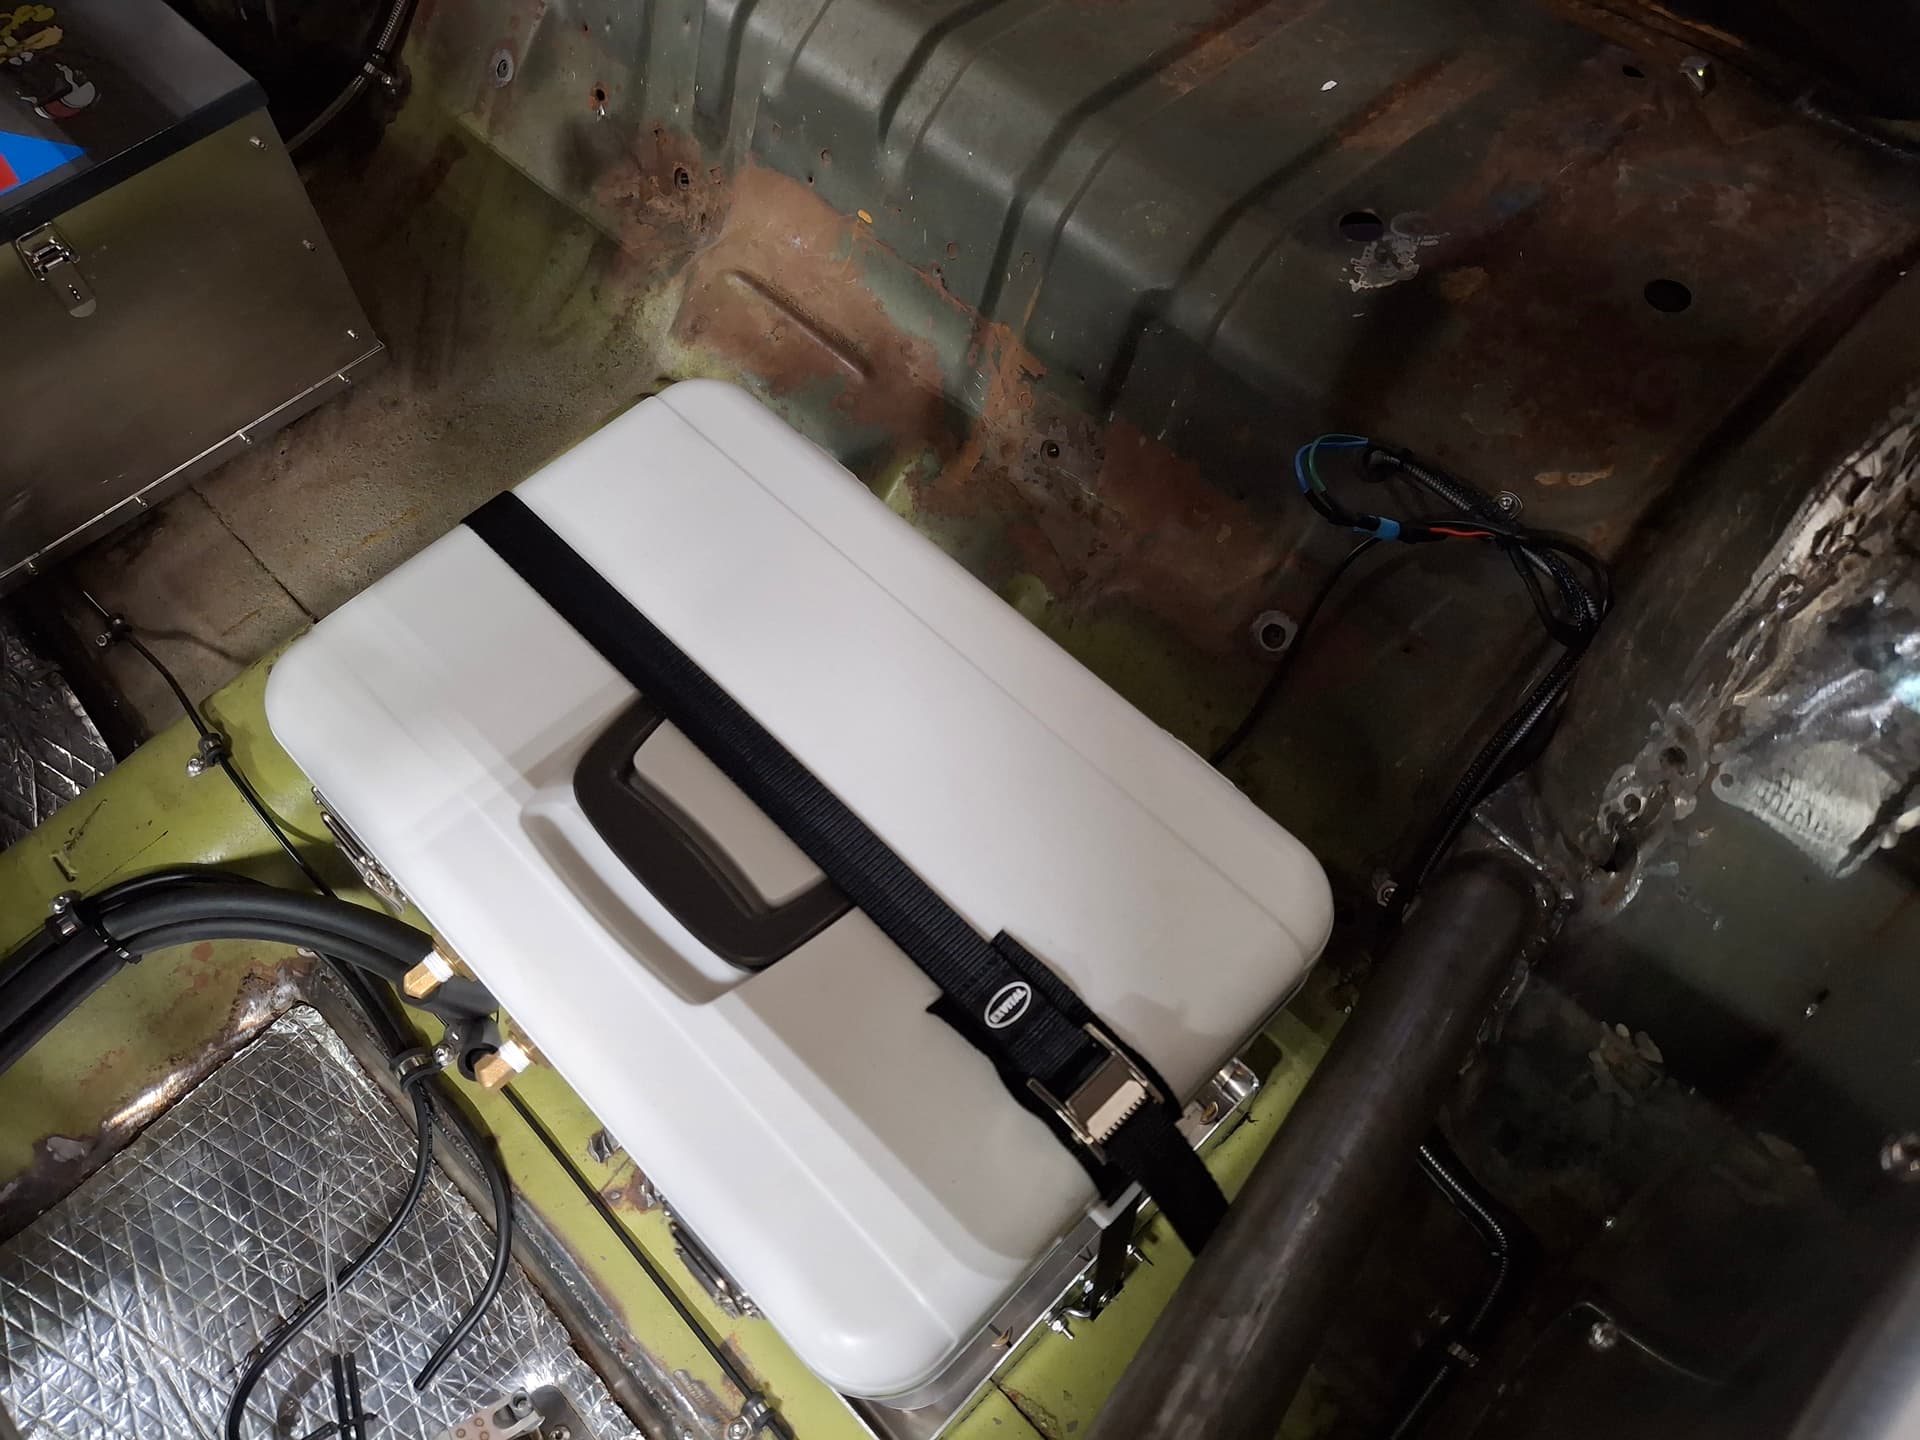
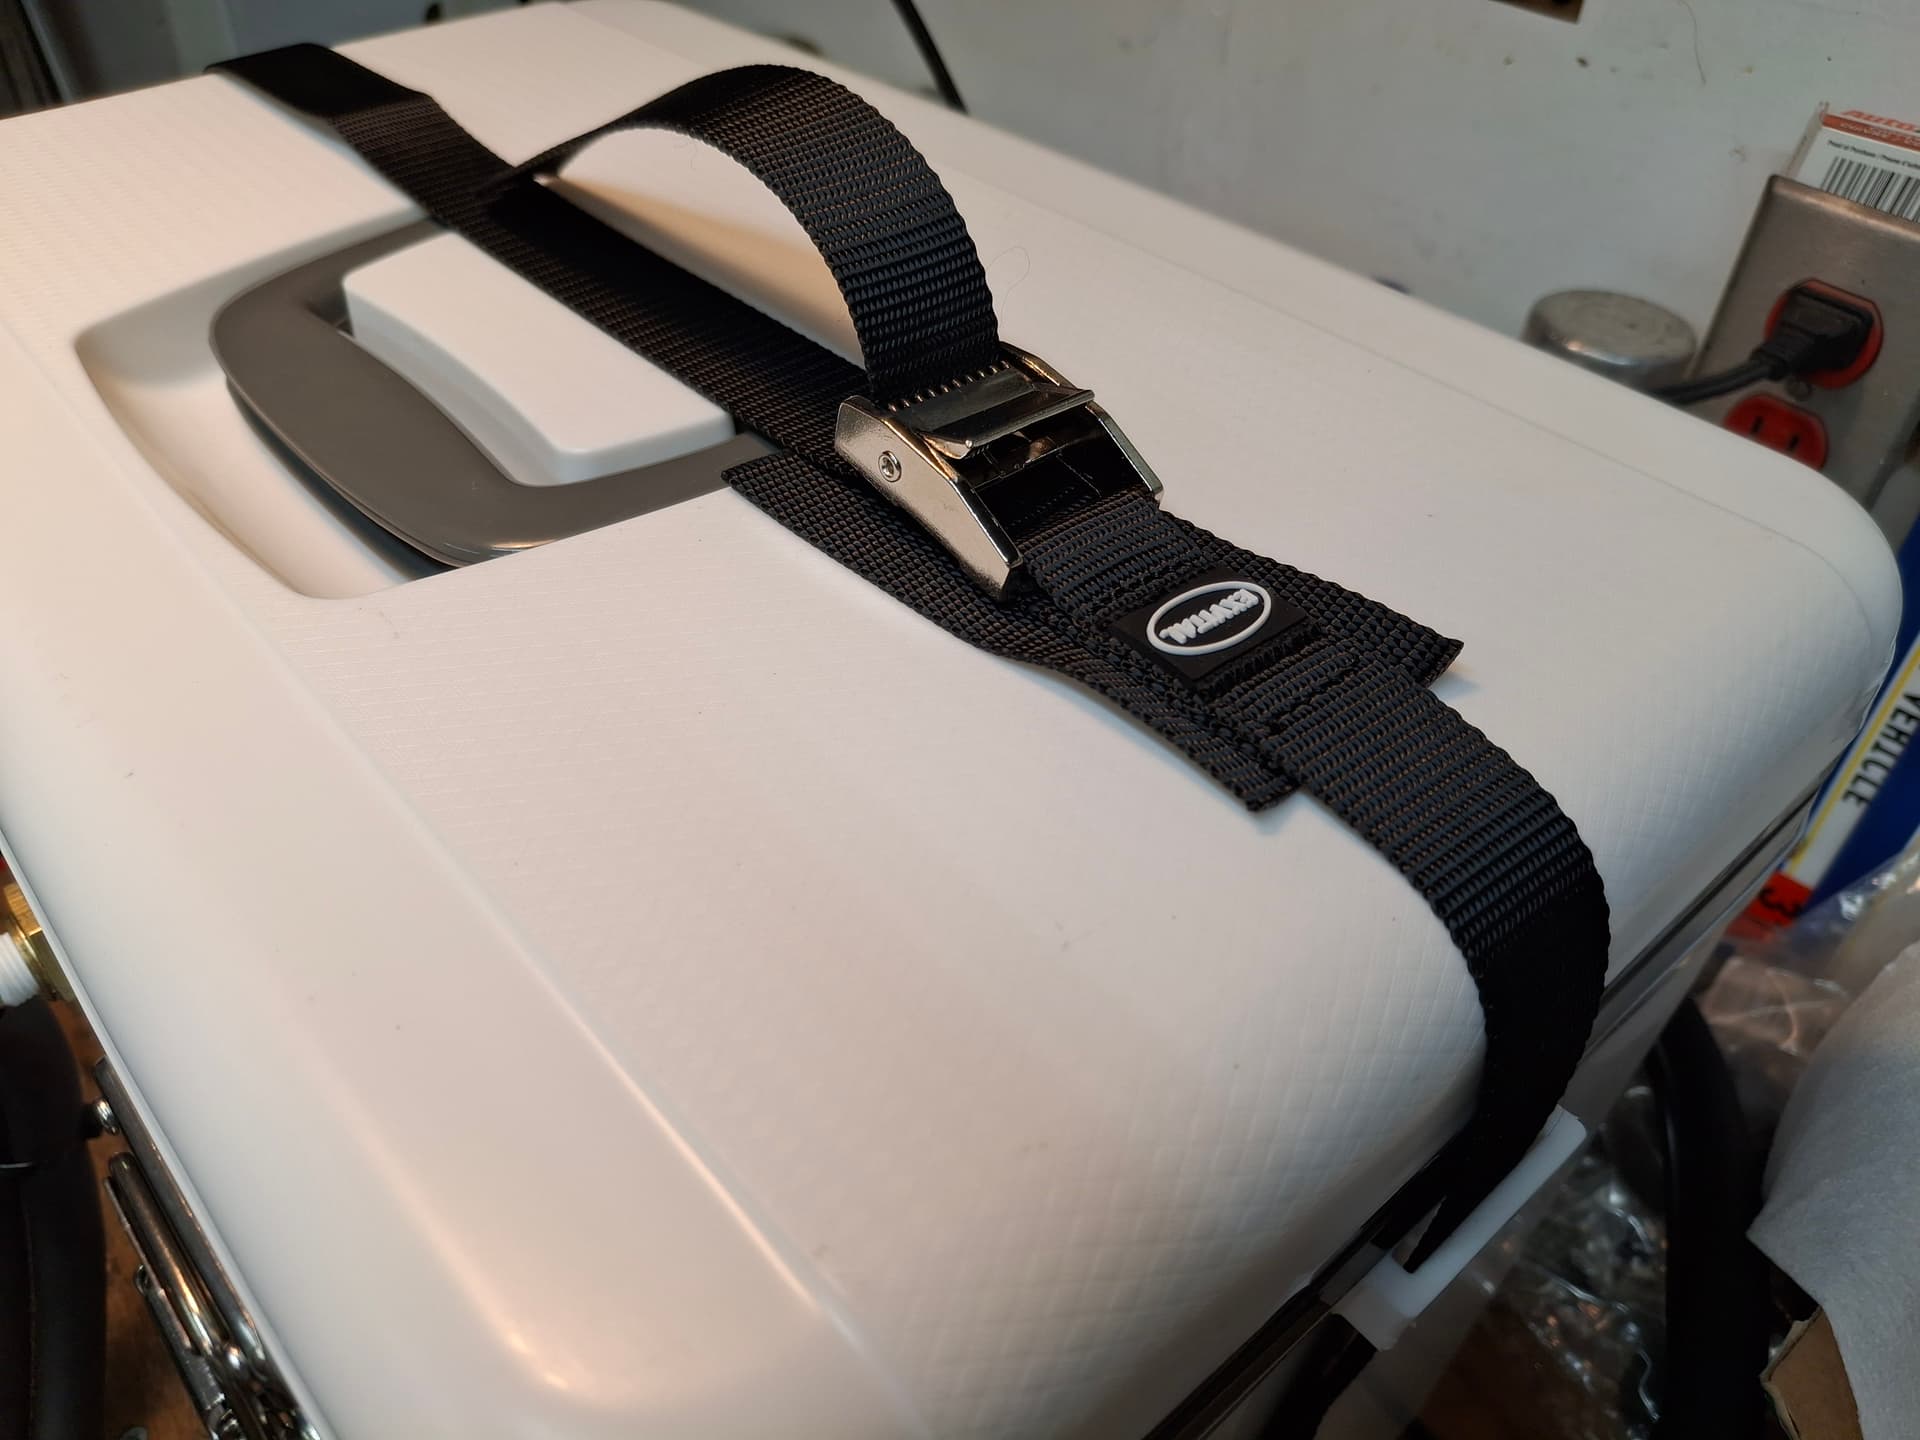
Container Hold-Down Straps: I purchased a pair of buckled hold-down straps with anchors for $8 and will be modifying them to work with my setup: Amazon.com: EXVITAL Battery Tie Down Strap Hold Down Kit, 1" x 48" Cooler Tie Down Kit with Non-Rusting Cam Buckle, Stainless Steel Bracket & SS Screws for RV Battery,Luggage Belt (2 Pack) : Automotive I will build an aluminum tray that the cooler will rest in to keep it from sliding around, so the hold-down strap over the top is to keep the cooler from jumping up. Whichever way you go for securing the cooler, make sure it can’t get loose.
Pump: This type of system uses a 12V DC submersible water pump of some form. Both Cool Shirt and Paragon use imported pumps, but I couldn’t decipher the exact brands since they are housed in a plastic baffle. A key is to get a pump that is strong enough to withstand ice cubes/blocks pounding it and with a sturdy screen to protect the impeller from ice. I found a pump with a stainless steel housing and removable stainless steel screen for $21 that should take the beating without requiring any baffle. Amazon.com: 12V 80W Submersible Transfer Pump Water Diesel Oil for Auto Marine Farm | Eelectric transfer pump, 8A current, handles water,ideal for automotive, marine, agricultural irrigation and more : Tools & Home Improvement
This particular pump is designed for fluids from light oil to water and draws 5A at a flow rate of 8 gallons per minute. With a 19-quart cooler, let’s say a reasonable capacity of water amongst the ice will be 2 gallons. The pump will cycle the volume four times per minute, which may be too much to where the ice will melt quicker than necessary; however, my next part should resolve the flow rate issue.
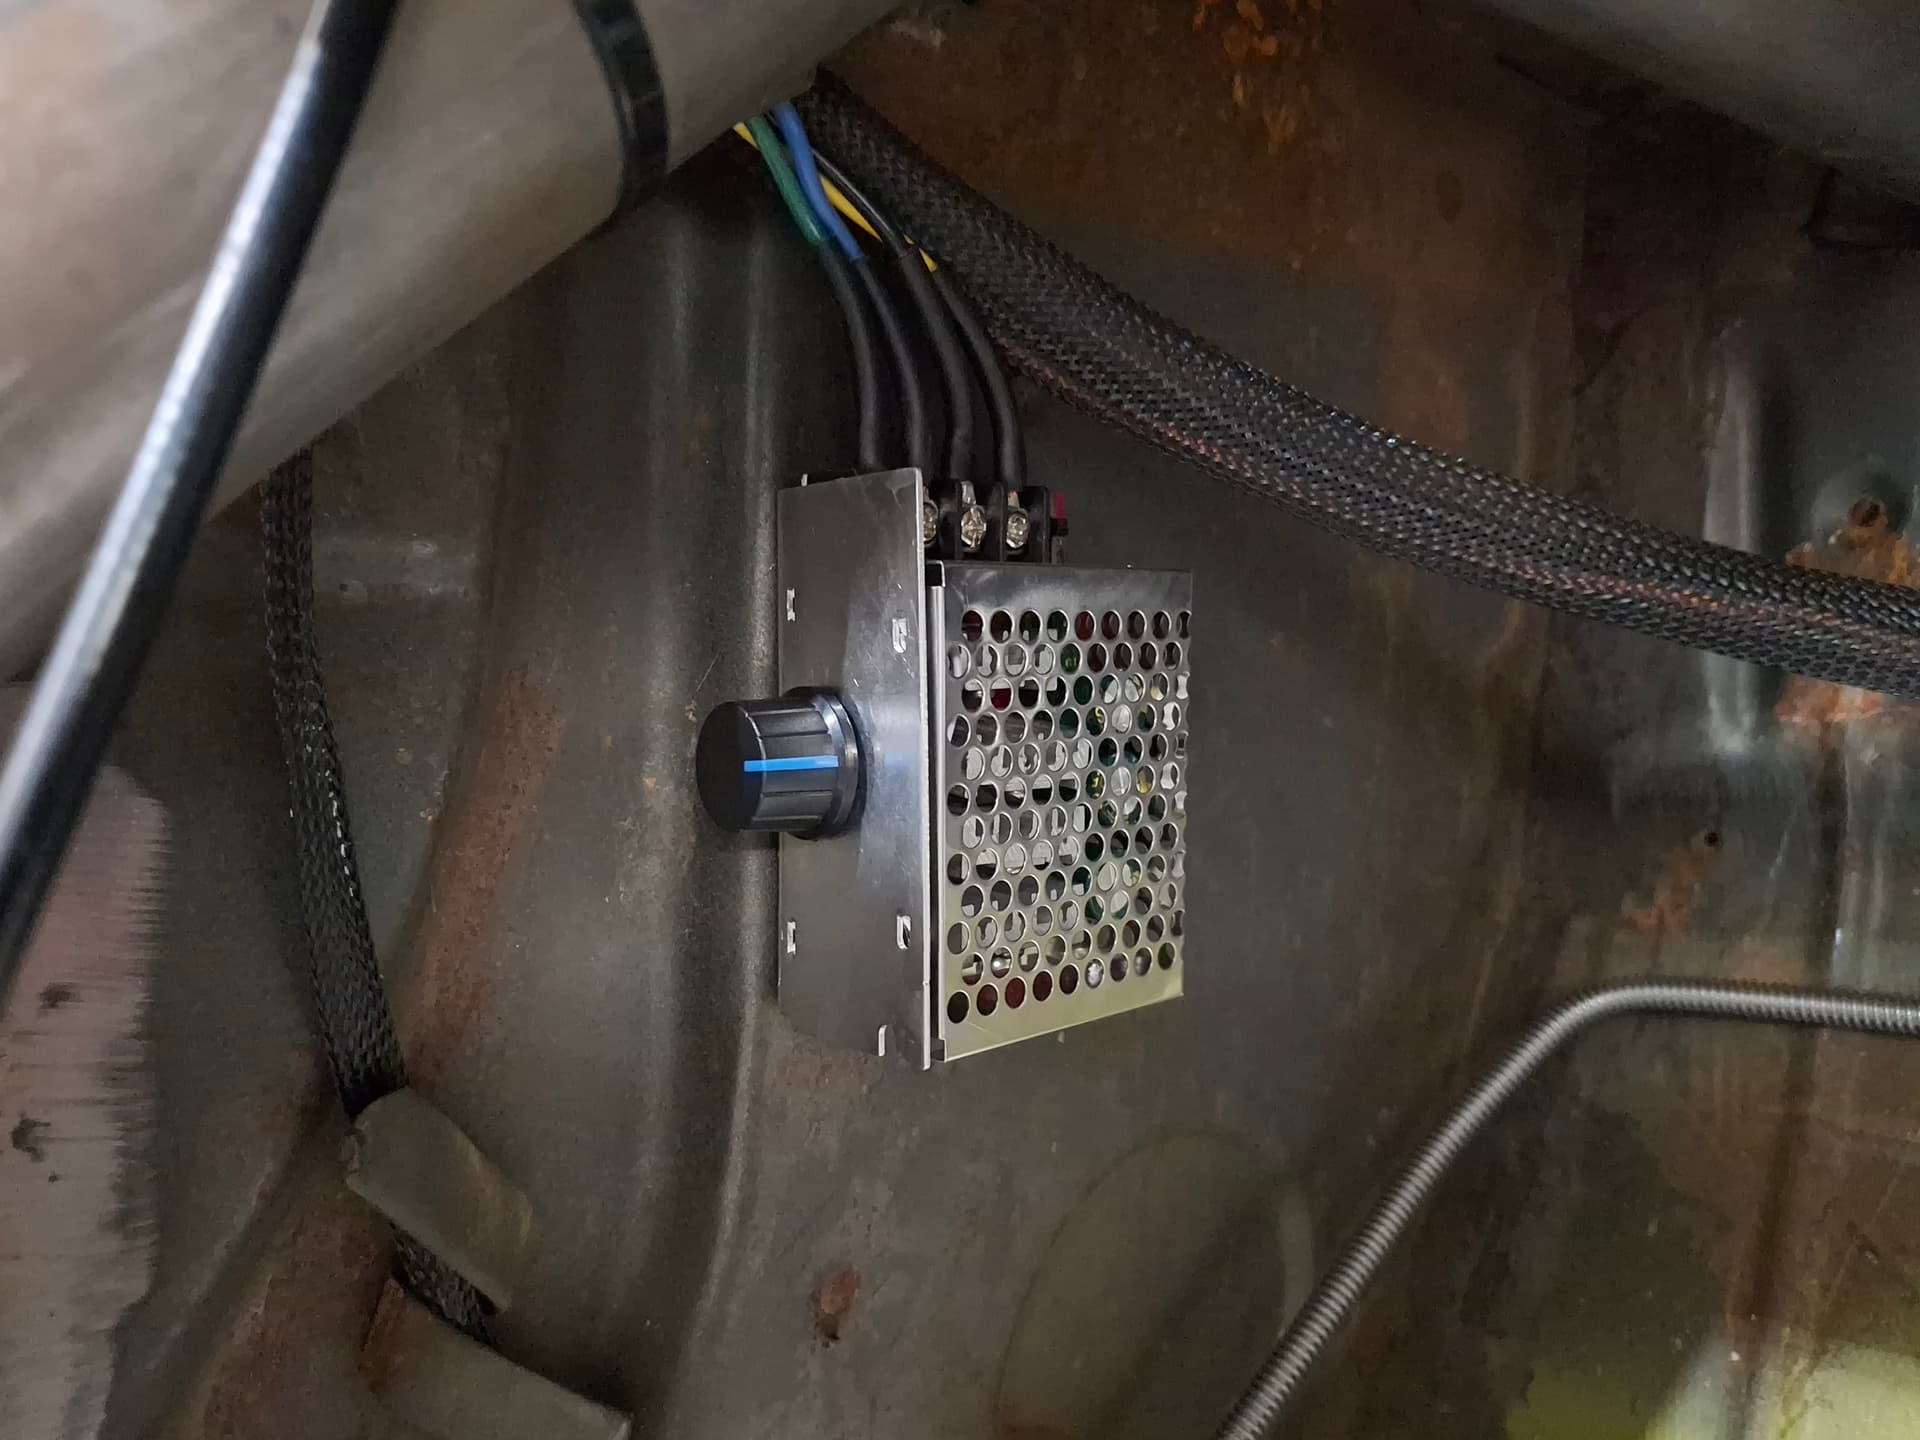
Pulse Width Modulator: To address the flow rate considering that the pump uses brushes, I incorporated a dial-type PWM that cycles power from 1% up to 100% so I can dial in the ideal flow rate for the specific system and my body’s needs based on the ambient temperature. I went with a stouter PWM that can handle up to 30A because it includes heat sinks and a clean mounting system for $12. The PWM could be mounted in the dash or next to the seat if you want to be able to adjust it on the fly. I didn’t want another knob on the dahs, so I mounted it where I can move the knob with the side of my shoe, and a toggle switch in the dash powers the pump on and off: PWM Speed Controller 7-70V 30A for Brushed Electric Motors, Adjustable Variable Speed Module with Brake Switch, Dual Fuse Protection, Supports 12V 24V 48V Systems - Amazon.com
Bulkhead Fittings: Cooling shirt hoses come in either 1/4" or 5/16” ID, so 1/4" NPT fittings are suitable. With the vibration in a race car, I wanted brass fittings versus plastic, but I struggled to find really long brass bulkhead fittings to get through the thick container wall, but I finally found some that are barely long enough without crushing the wall. Keep in mind that the container isn’t pressurized, so the bulkhead seals only need to keep sloshing water from leaking out. I went with these fittings at $12: Hooshing 2PCS Brass Bulkhead Fitting 1/4" NPT Female Coupling and 1/2" Male Straight Thread 33mm Extending Water Tank Connector: Amazon.com: Industrial & Scientific
Inside Elbow Fittings: The pump’s outlet barb is 3/4 OD, but I couldn’t find 3/4” hose barb elbows in either 1/4” or 3/8” NPT at local hardware stores or easily online. I went with 1/4" NPT to 1/2" barb elbows at $9: 4 Pcs 90 Degree Elbow Brass Barb Fittings, 1/4 Inch NPT to 1/2 Inch OD Hose Barb for Low-pressure,Fuel,Air and Non-potable Water Chilling Application: Amazon.com: Industrial & Scientific
Inside Barb Reducer: To go from the pump’s 3/4" barb to the elbow’s 1/2" barb, I used a sprinkler-system reducer for $1: https://www.lowes.com/pd/Apollo-3-4-in-x-1-2-in-Polypropylene-Reducing-Coupling-5-Pack/5012921705
Inside Hoses: I already had a short piece of 1/2" PVC hose to connect the elbow fitting to the pump reducer and a piece of 3/4" heater hose to connect the reducer to the pump, and I had a length of 1/2" latex hose to use for the return hose to go from the elbow fitting down to the floor of the container. Factor in buying these hoses if you need them.
Outside Elbow Fittings: The Cool Shirt and Paragon system use expensive female CPC quick-disconnect plastic fittings coming out of the cooler that the hoses connect to, but I don’t like that design because of the vibration stresses placed on the plastic threads. The Paragon hoses are 1/4" ID hard plastic, so I decided I would remove the male quick-disconnect fittings from the end of the hoses and press the hoses directly onto barbed fittings in the cooler to remove the need for a quick disconnect. I will rarely, if ever, need to remove the hoses, so factor in obtaining CPC female sockets if you want a disconnect at the cooler. The elbows cost $8: 2PCS 1/4" Hose Barb x 1/4" NPT Male 90 Degree Elbow by CX WONDERLAND | 1/4" Barb x 1/4" NPT Male, 90 Degree Brass Elbow, Fitting for Hose/Pipe Connections: Amazon.com: Industrial & Scientific
Insulated Hoses: Initially, I looked into building my own hoses from the container to the shirt, but the cost of the hose, the special hose insulation sheathing, and the CPC female socket connectors made purchasing a hose the most economically wise path. I only needed 3’ of hose to give me plenty of slack, so I went with a 4’ Paragon hose from ebay for $69: https://www.ebay.com/itm/387738579271
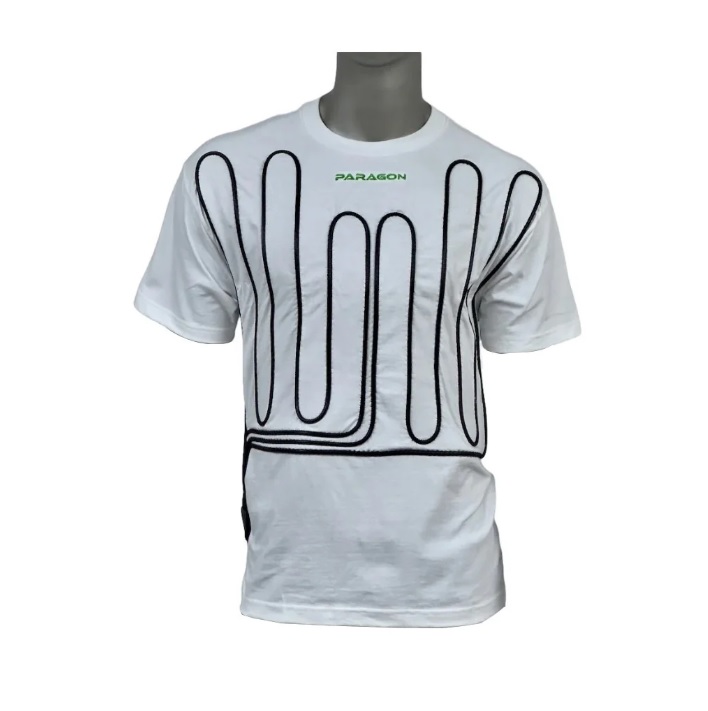
Cooling Shirt: I suppose if someone wanted the project, he could buy a very long roll of tubing, fittings to join them, and a cotton shirt and spend many hours sewing the tubing to the shirt, but that’s one project I’ll farm out in this situation. Scrounging around, I found a new Paragon 42-10100 cool shirt on ebay on closeout for $105. It happened to be a righthand hookup, which works perfectly for my container’s location and more clearance on my right alongside the driveshaft tunnel. The retail price of either a Paragon or Cool Shirt standard shirt is about $170.
Electrical: I already had a toggle switch, wire, and terminals, so include those parts and prices if you need them.
Total Cost: All in, the system cost me about $350 after tax/shipping. A savings of $300 might not be worth it to some, but it is to this budget racer, and I was able to build the system with what I think are stronger components compared to what Cool Shirt and Paragon use.
Fabrication and Installation
Container Prep
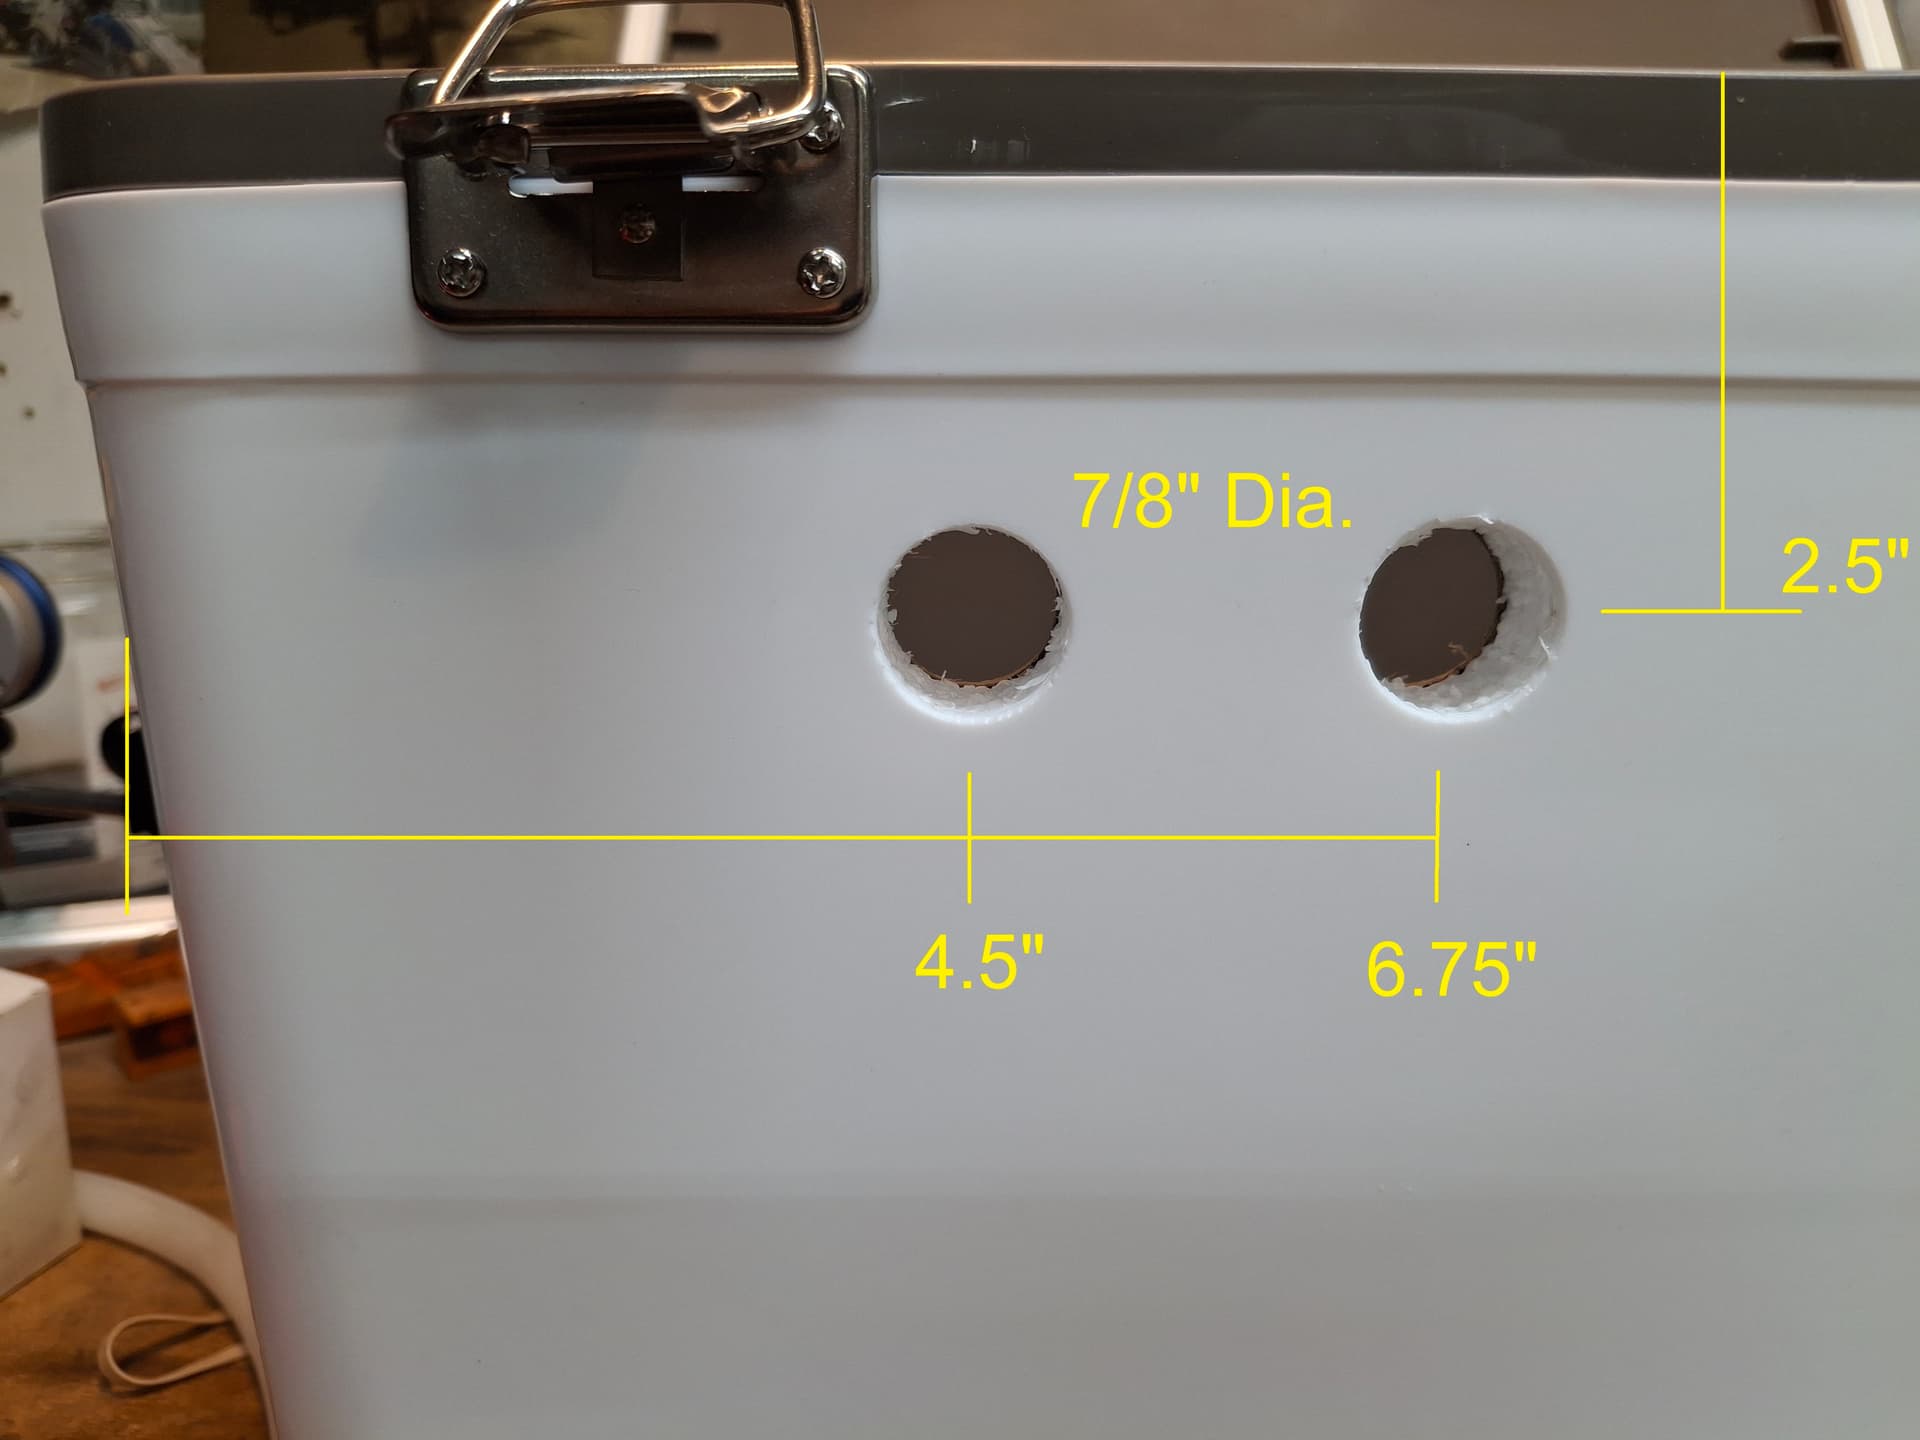
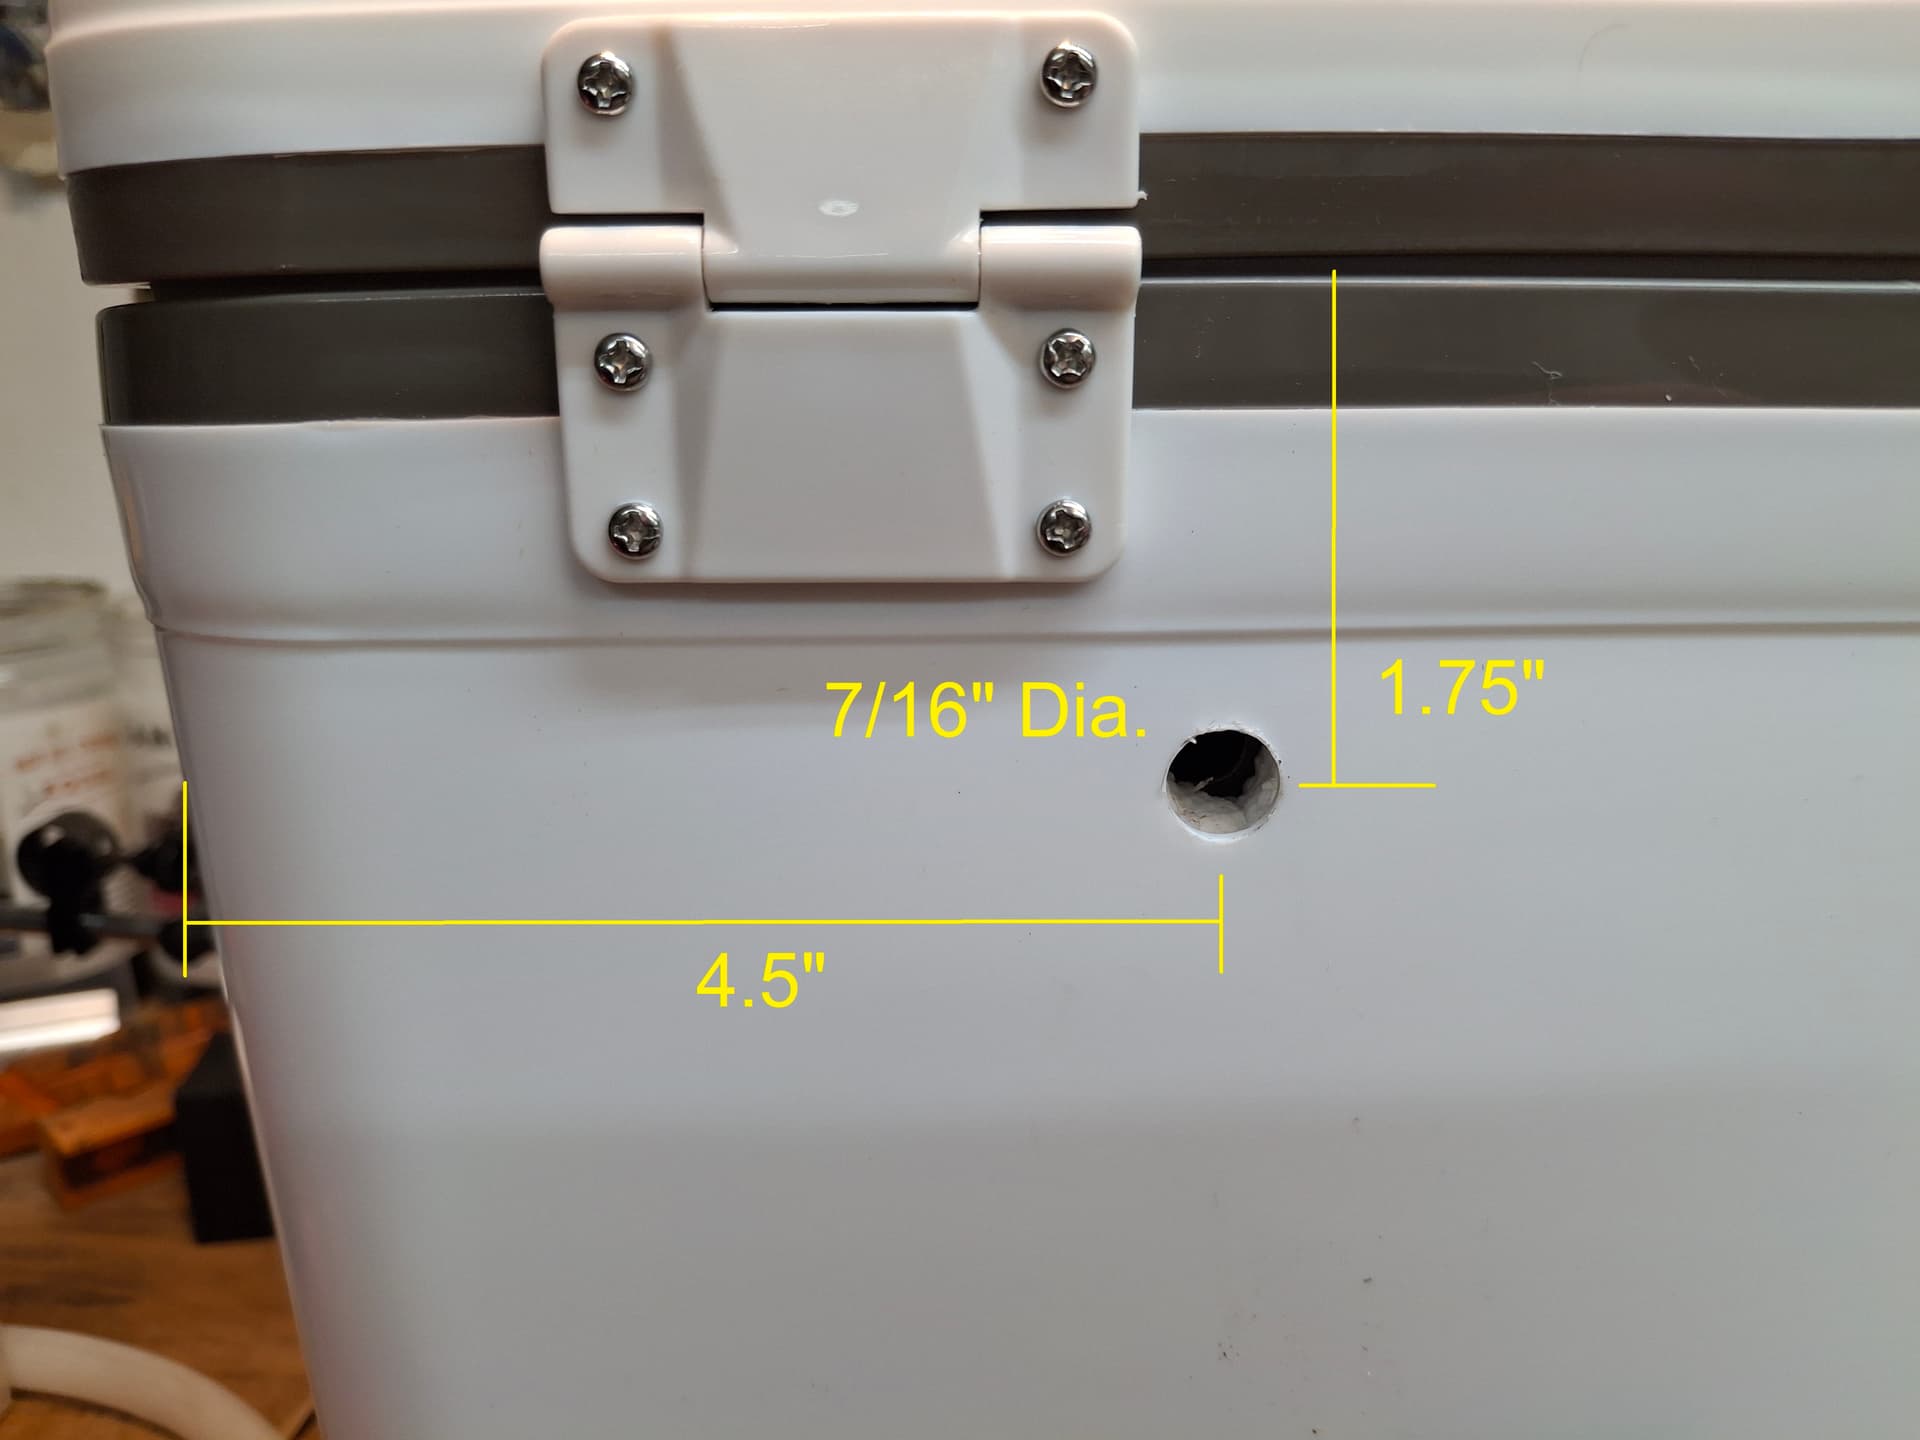
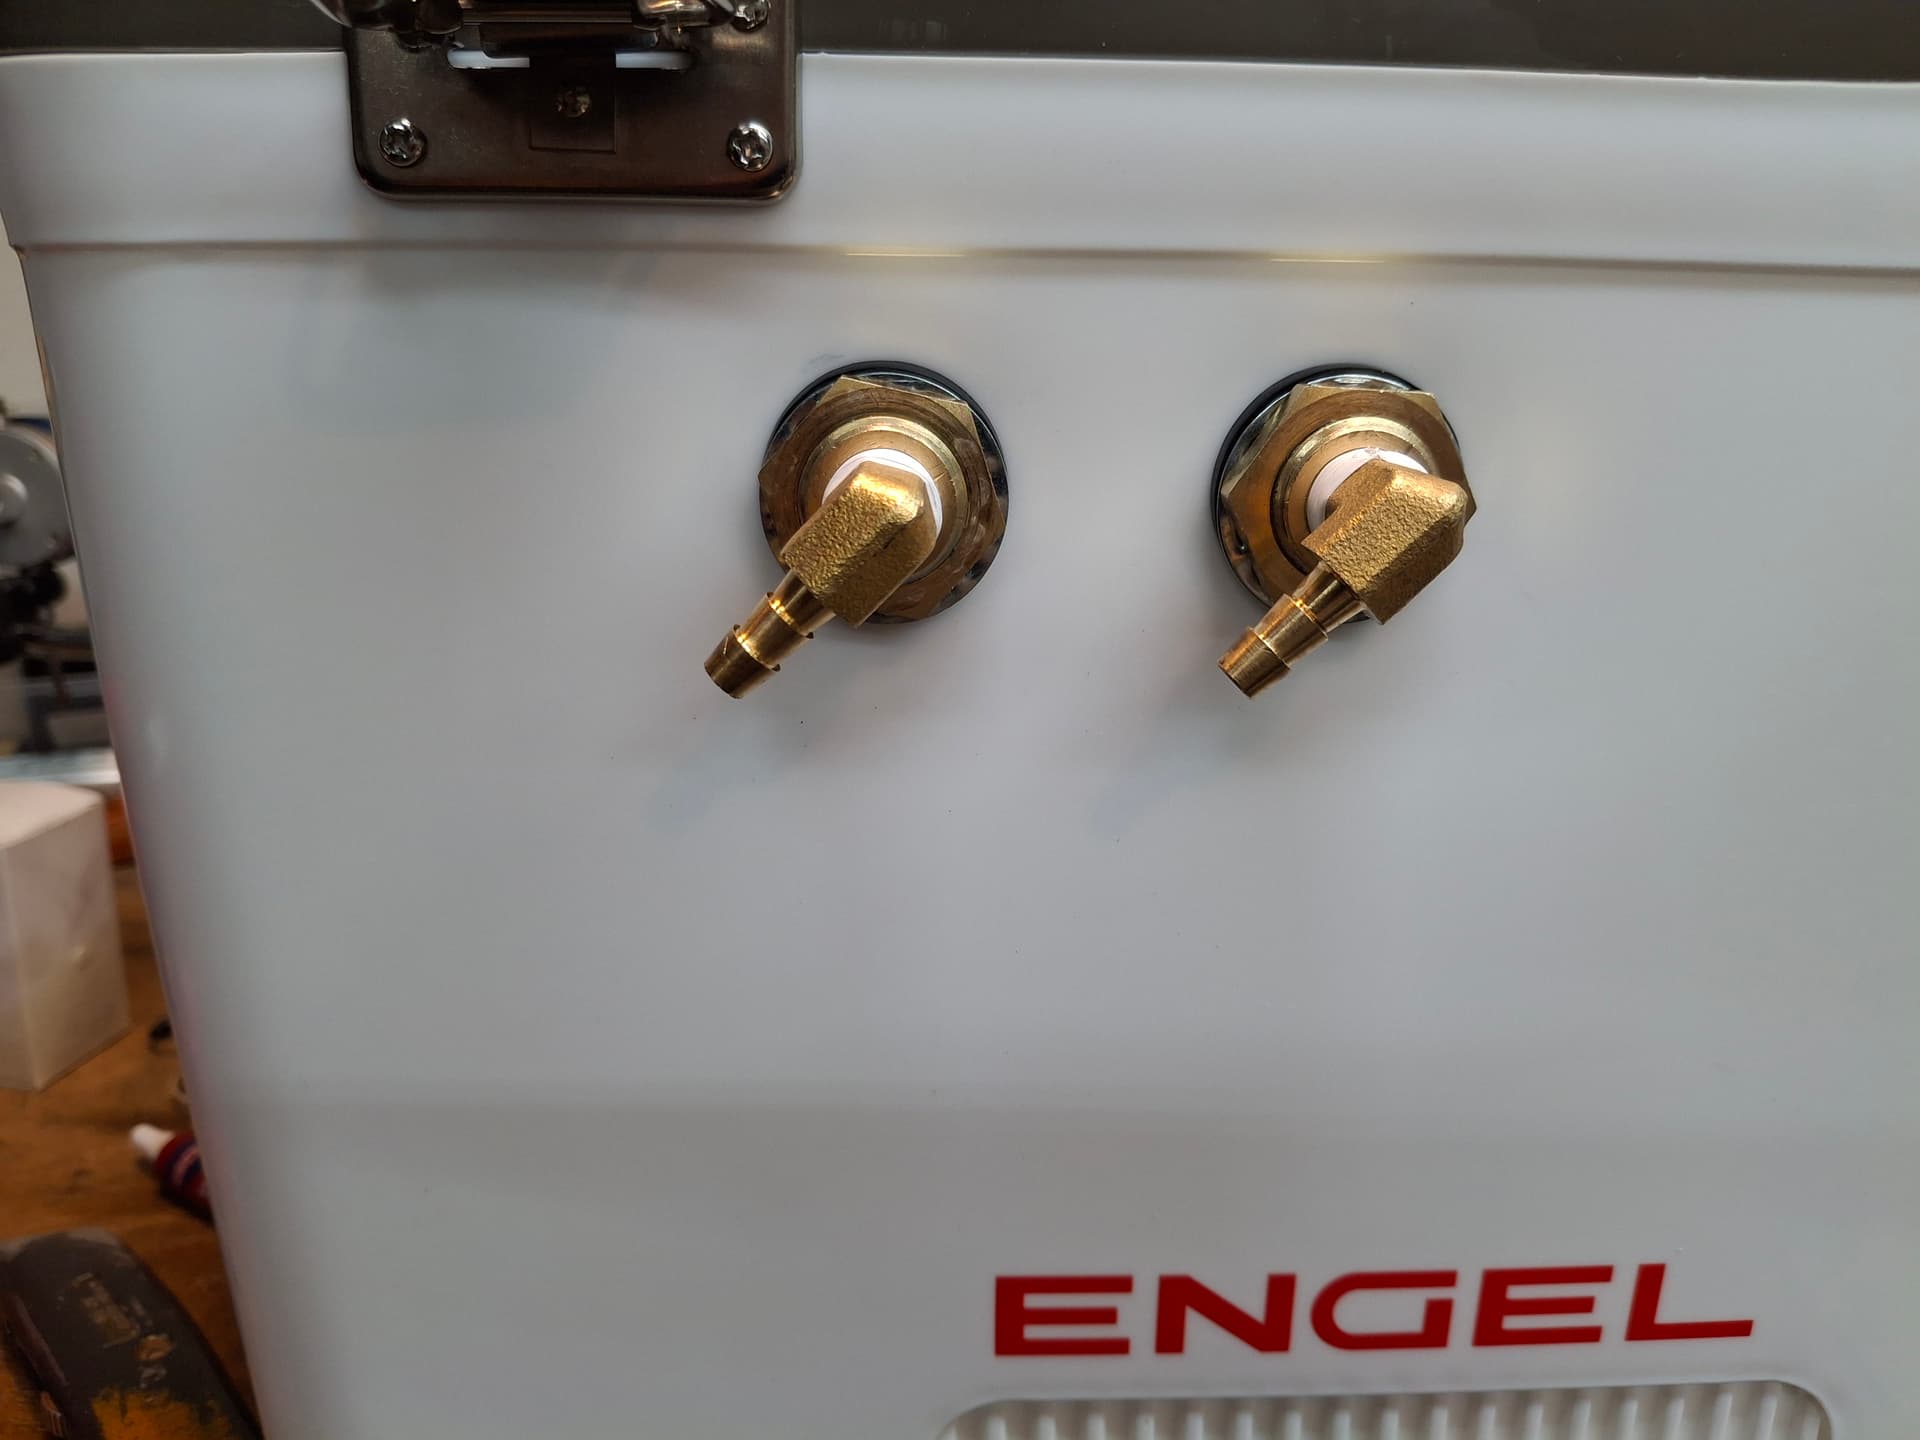
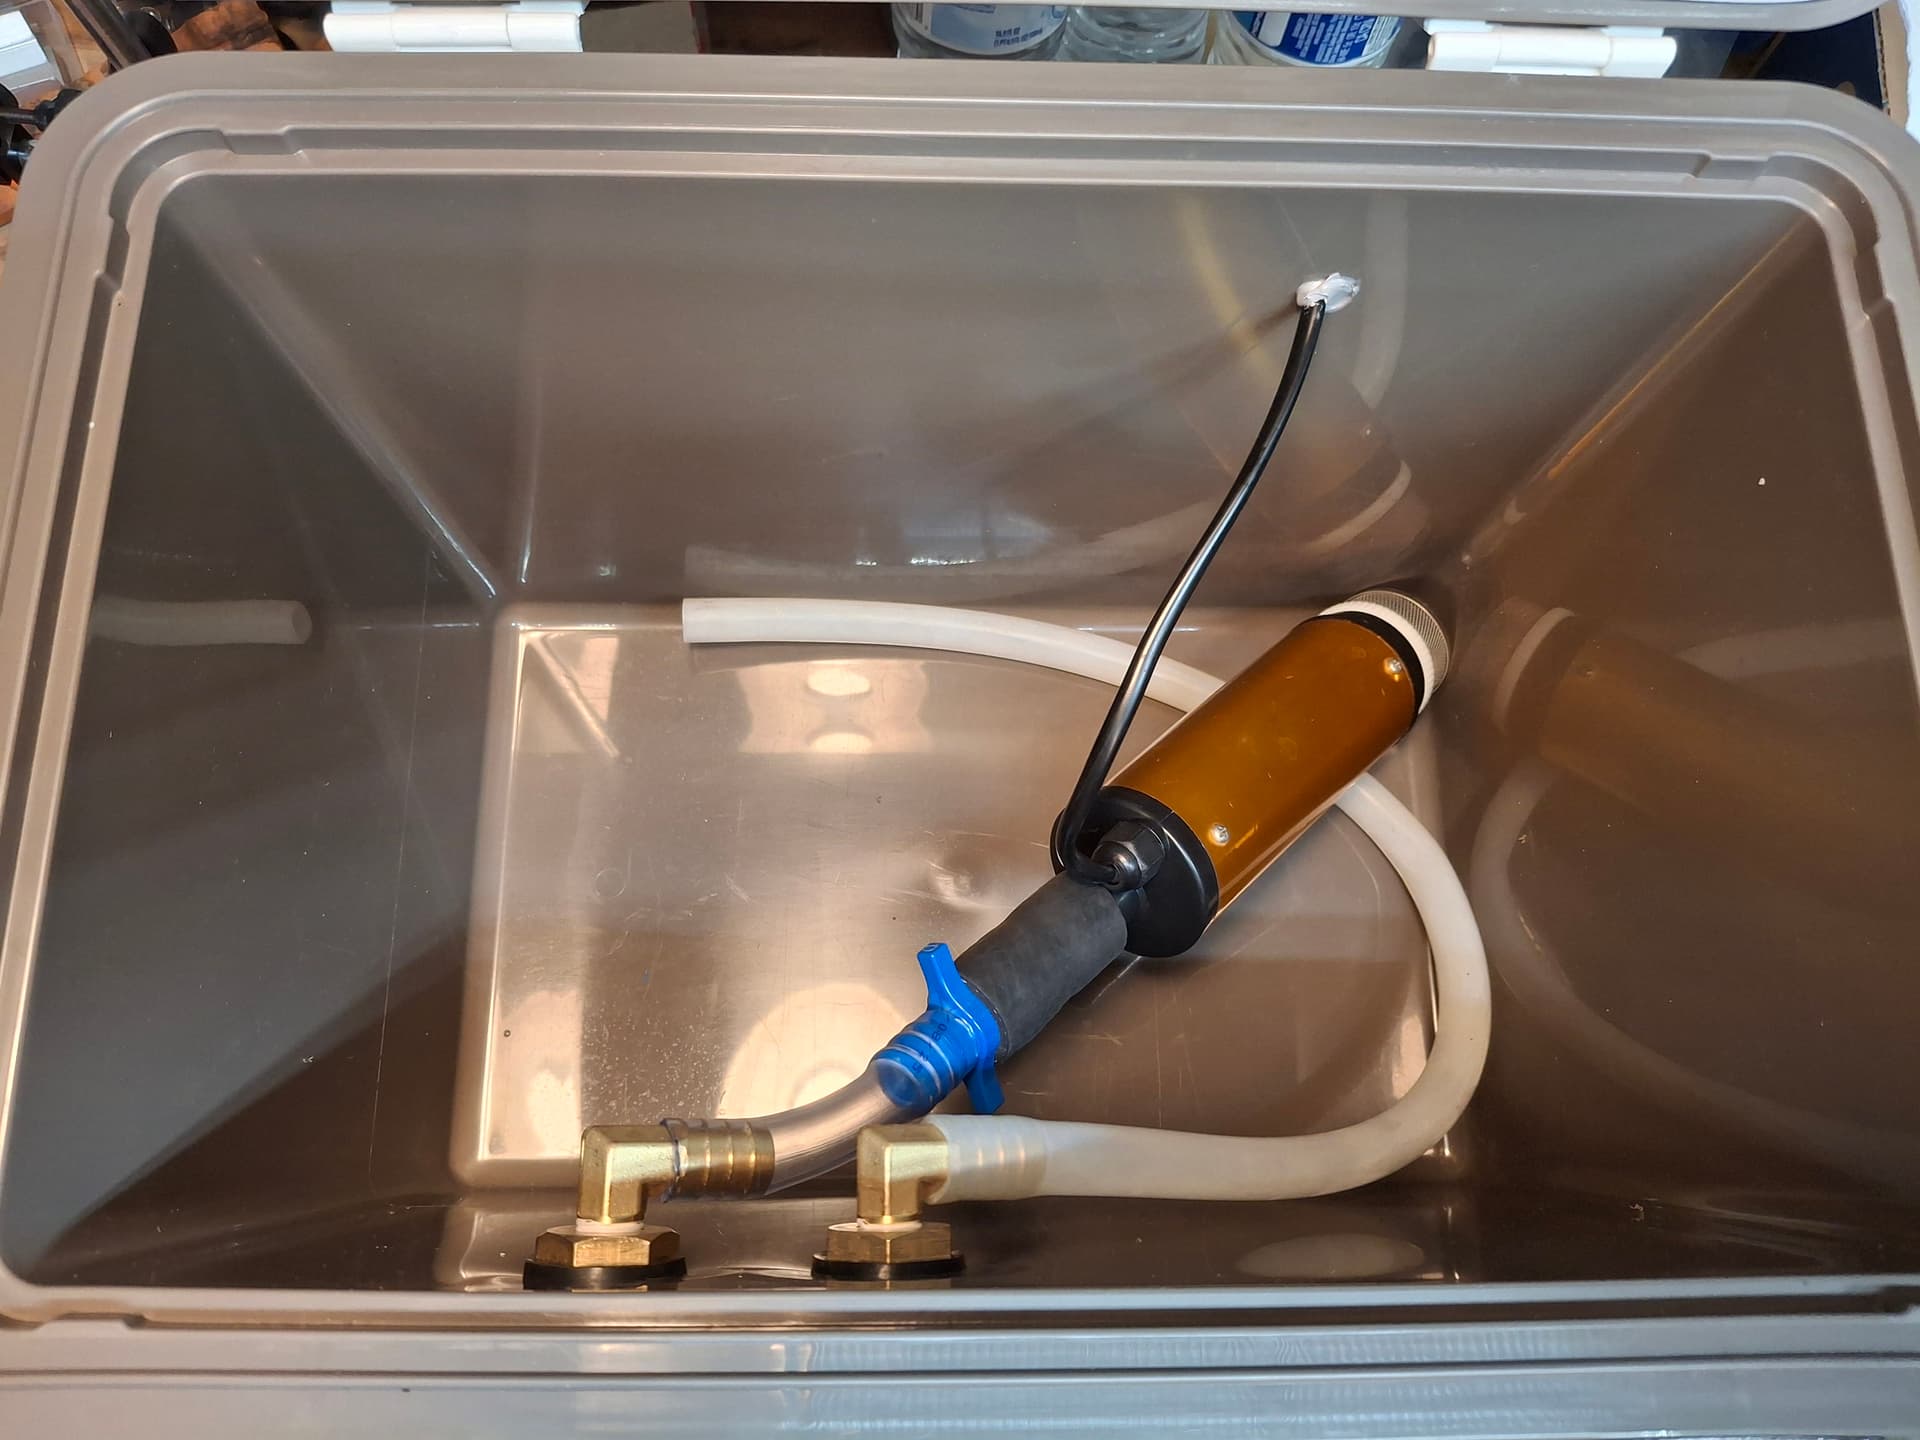
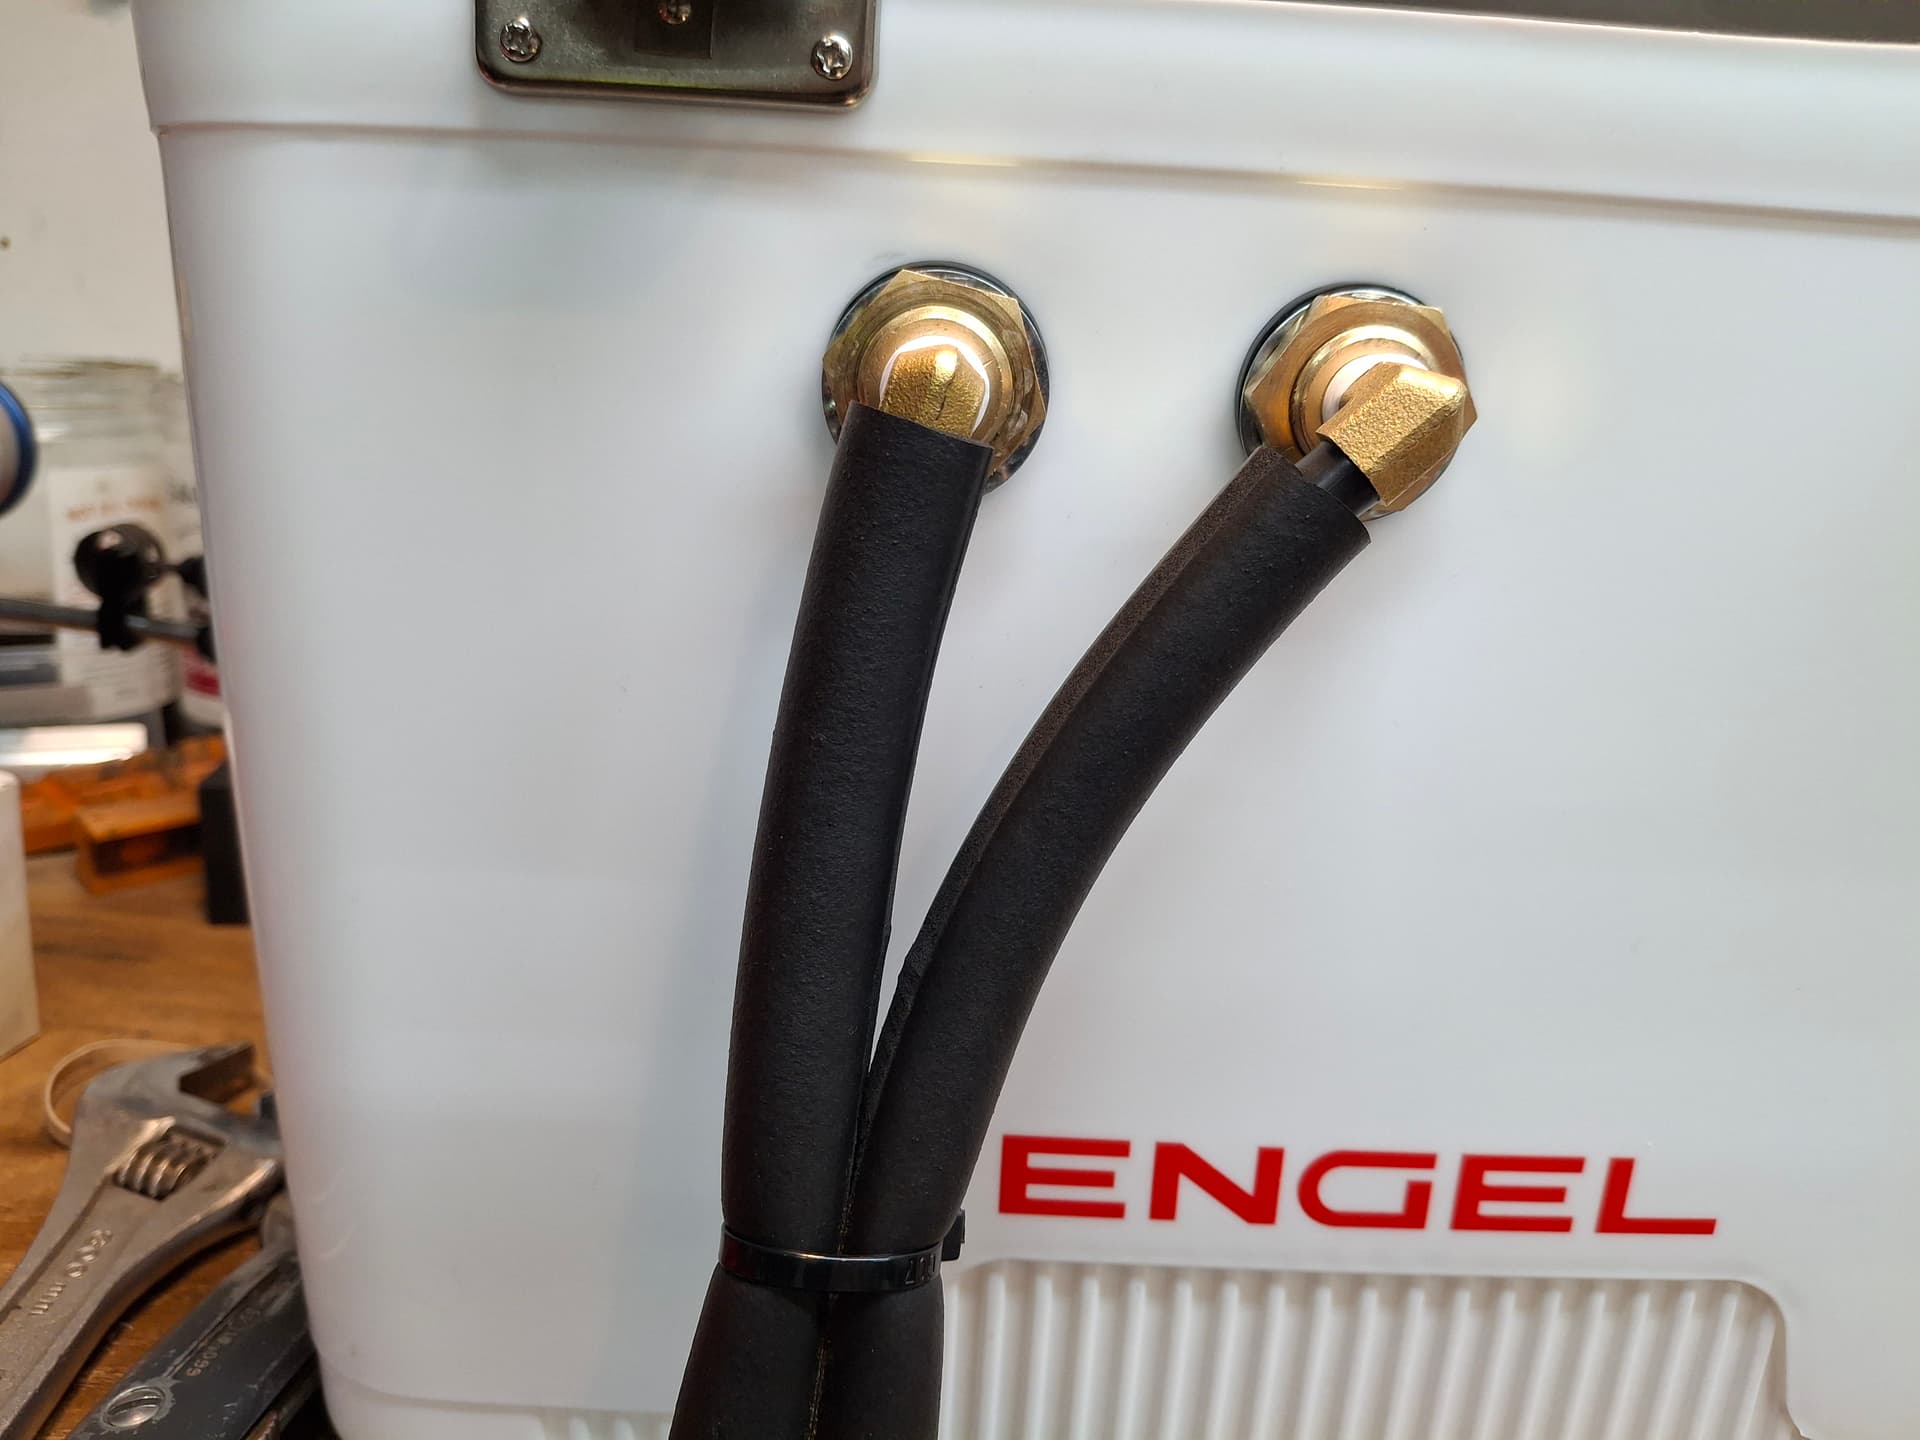
I laid out where I would place the container and locate the hose, and I decided to place the pump pickup on the left (driver’s) side of the cooler since our race tracks are predominantly right-turn and the water will be sloshed that way more than to the right side. I drilled two 7/8” holes near the top of the container wall, cleaned up the edges, installed the bulkhead fittings with rubber washer seals, and applied a liberal amount of blue thread-locker to the outside bulkhead nut for good measure. Be careful to snug the nut down only until the two rubber gaskets seat so as to not crush the foam insulation/wall. Using PTFE tape on the fittings, I screwed them into the bulkheads and positioned them for proper hose alignment. I drilled a 3/8" hole on the back wall for the pump wires.
Plumbing
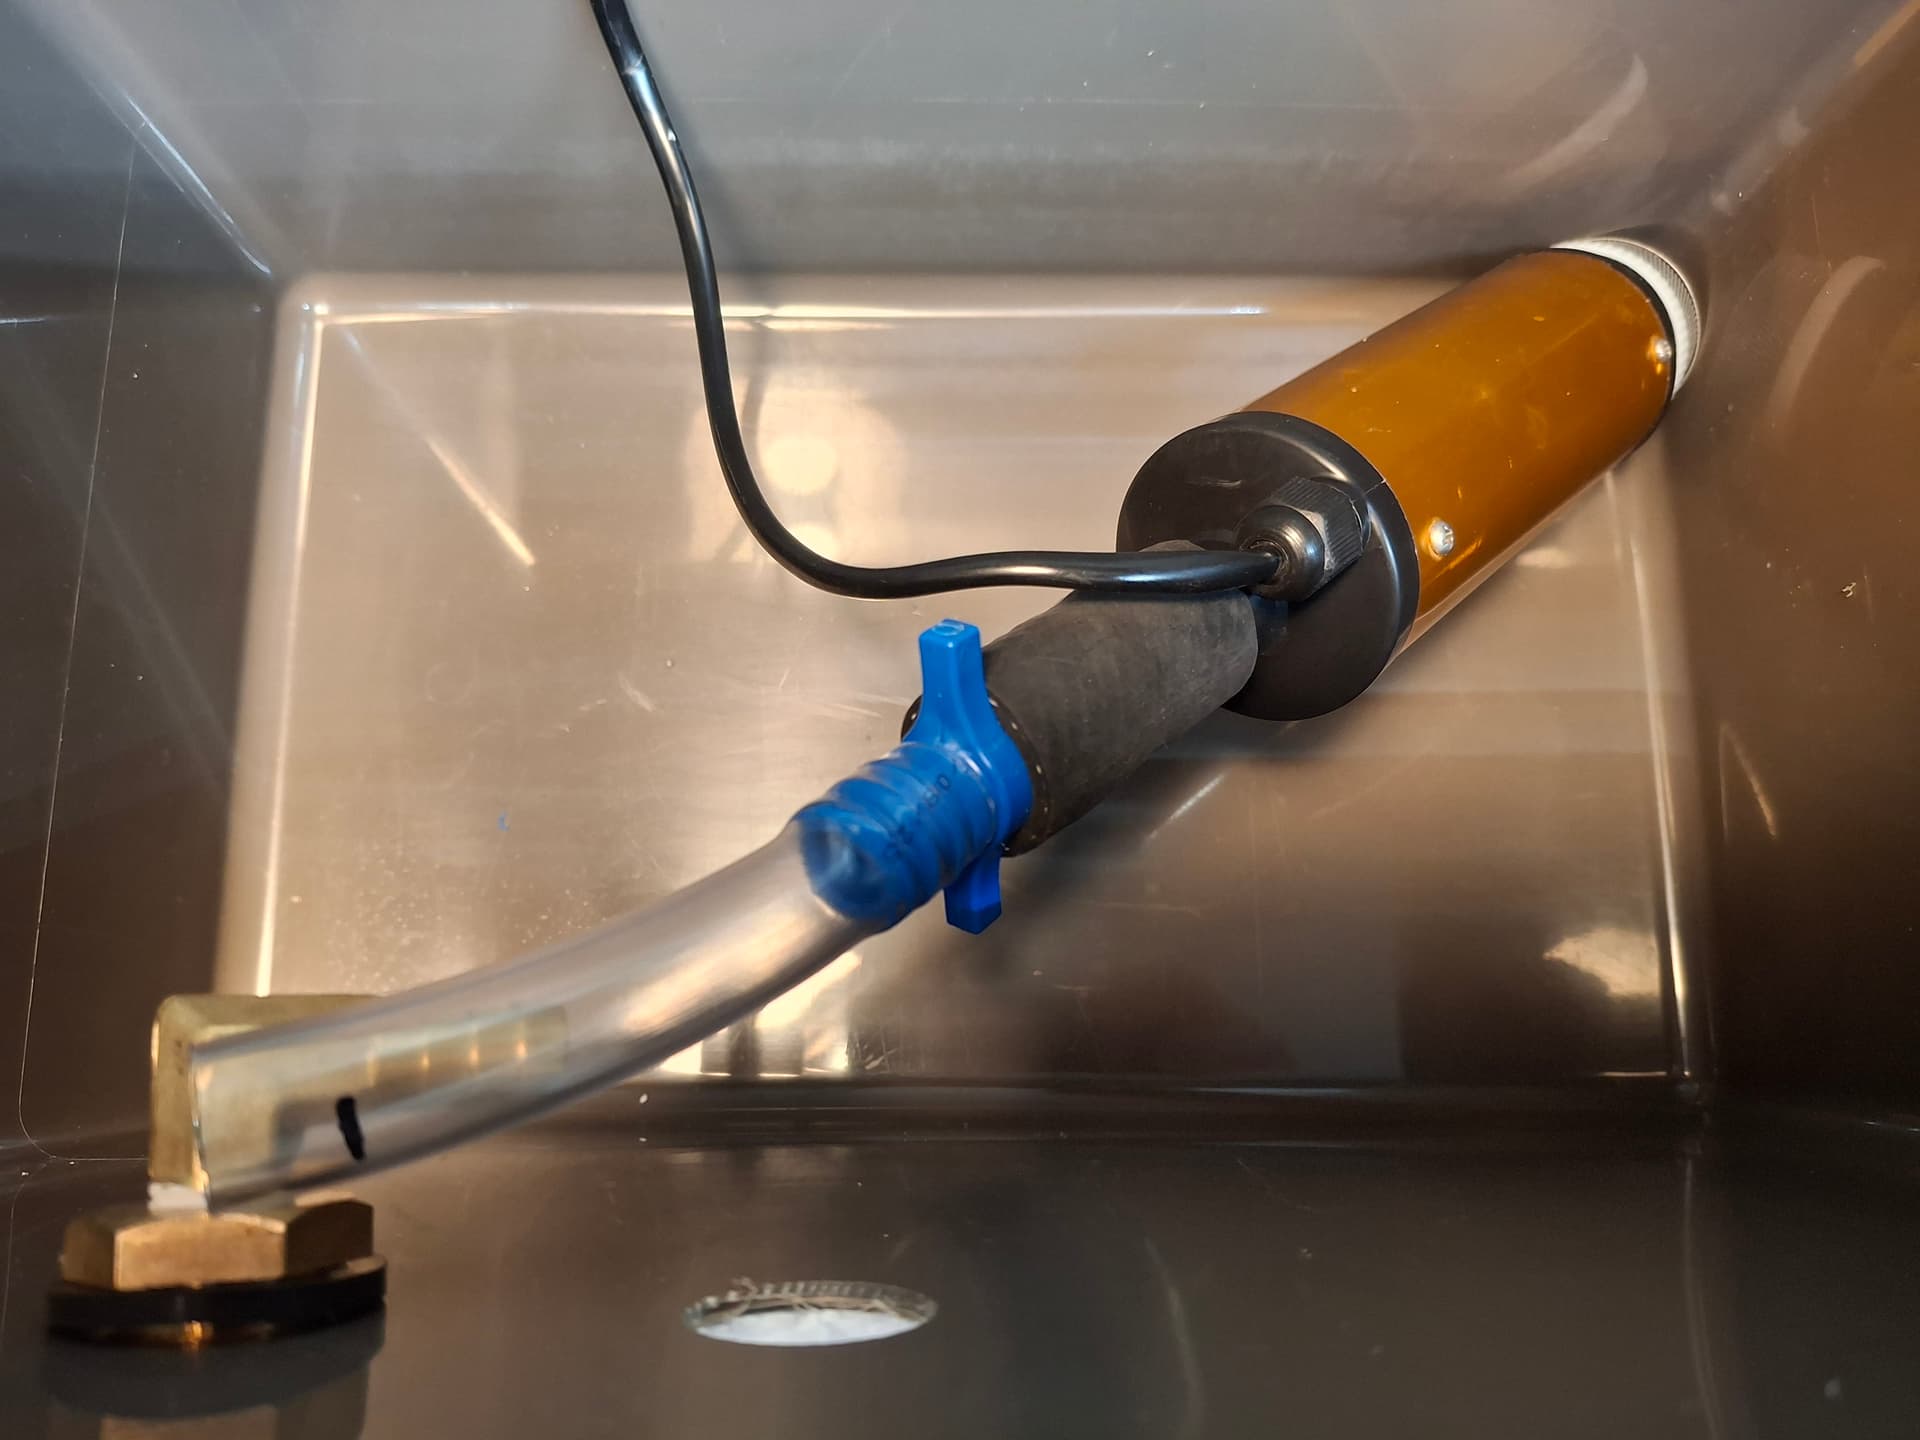
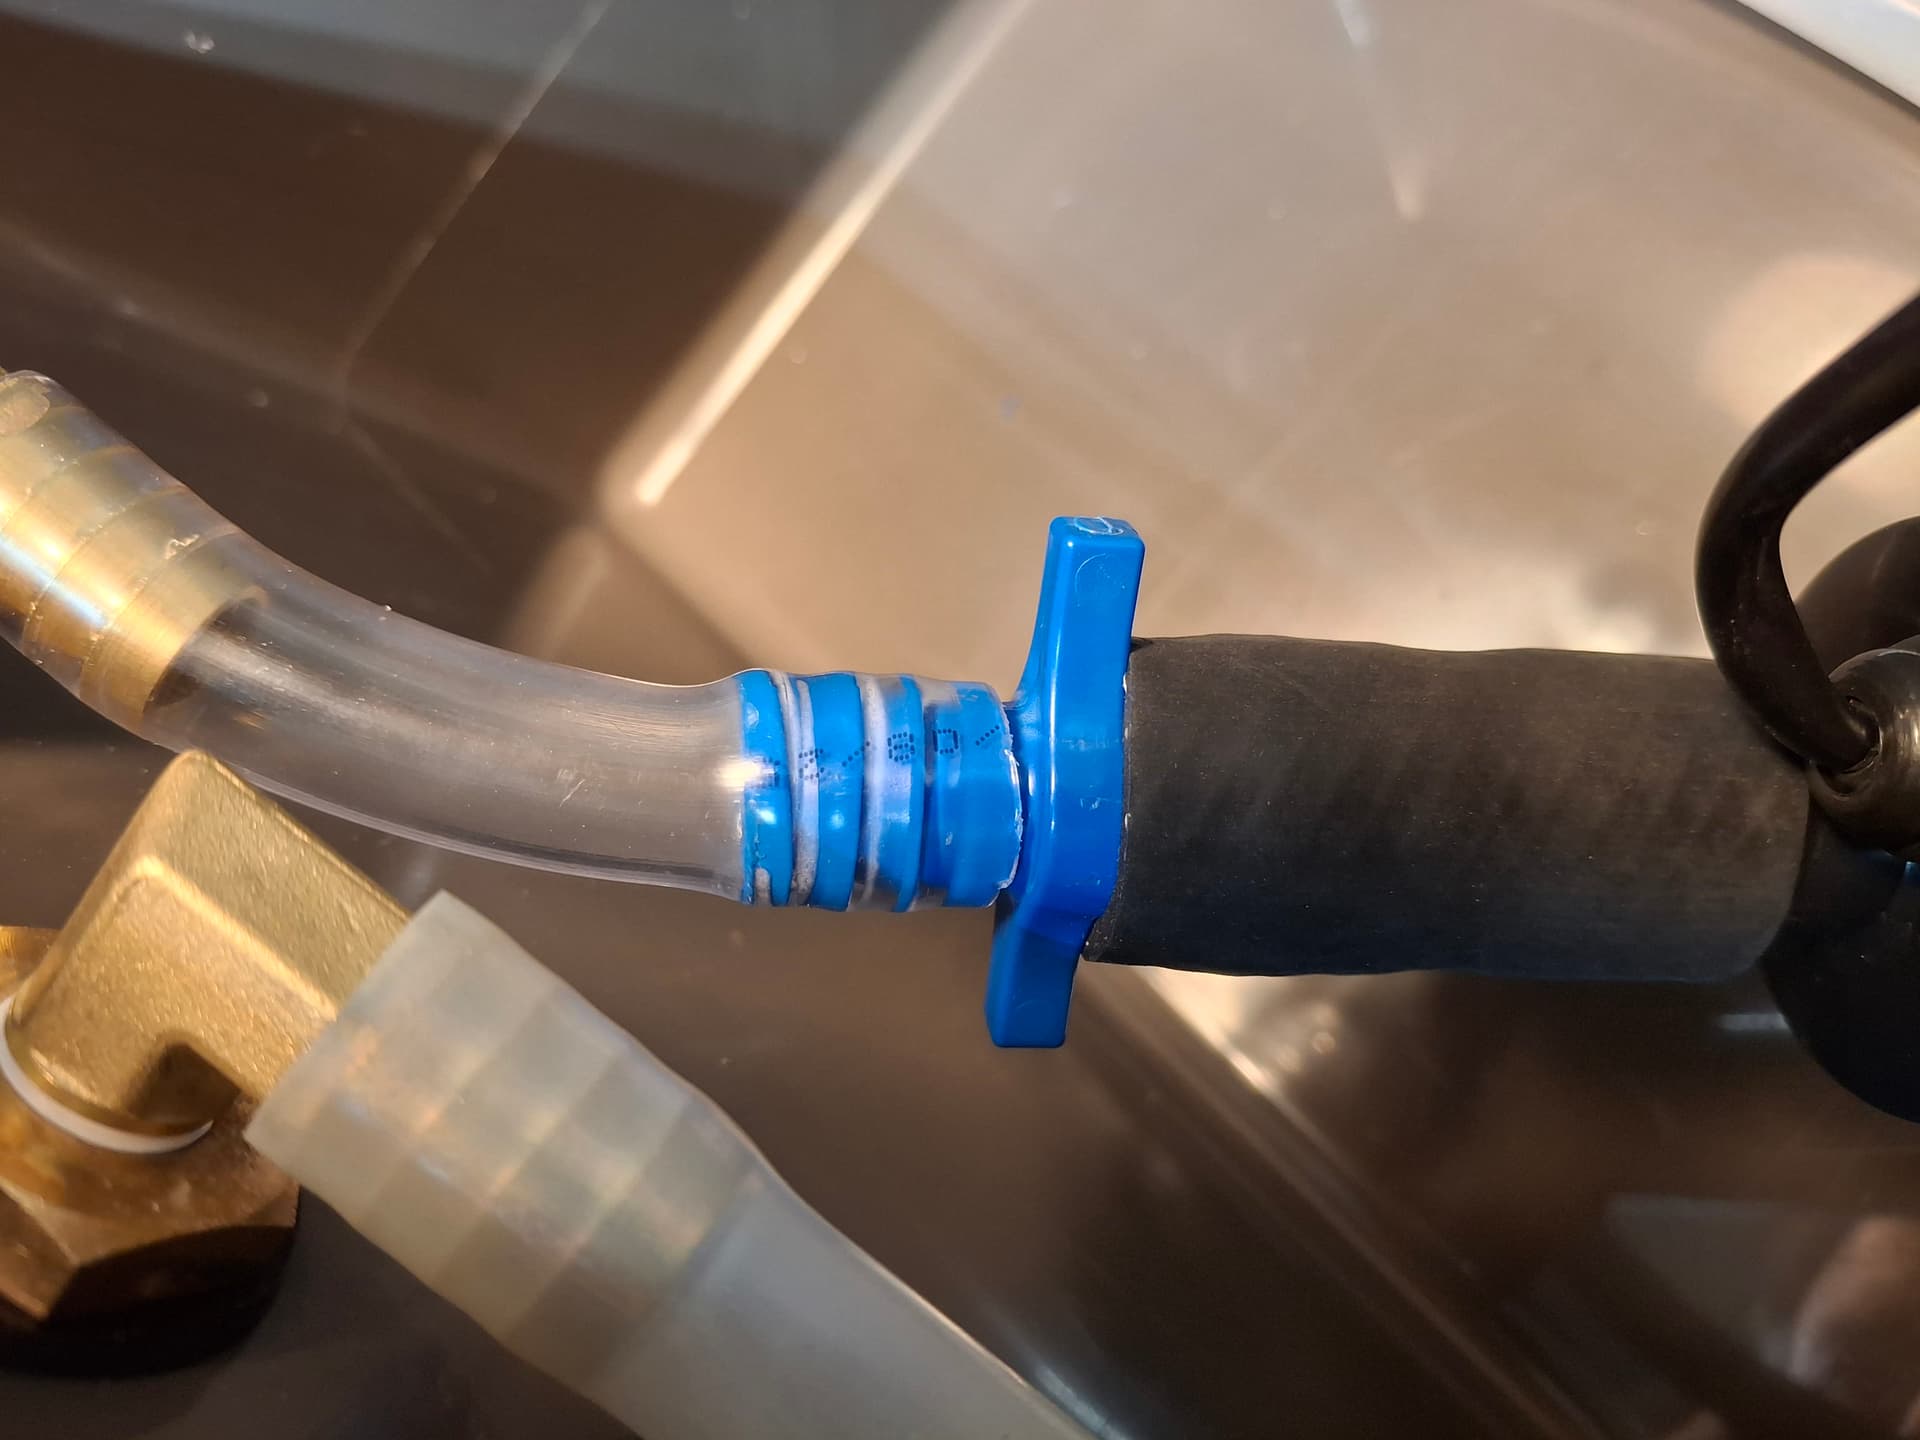
To provide more hose flexibility, I cut down the reducer fitting to the two main barbs with a hacksaw. I connected the pump to the reducer with the 3/4" heater hose and them installed a piece of 1/2" PVC tubing too long onto the reducer. I slide the pump assembly into the corner of the cooler to where it is pinned well and marked the 1/2" PVC tubing before cutting it to length and installing it over the bulkhead elbow fitting. I installed the return hose from the elbow to the floor on the opposite side of the pump intake. Make sure to install the return opposite the pump so that the pump doesn’t just recirculate the water already heated by your body.
Pump Wiring
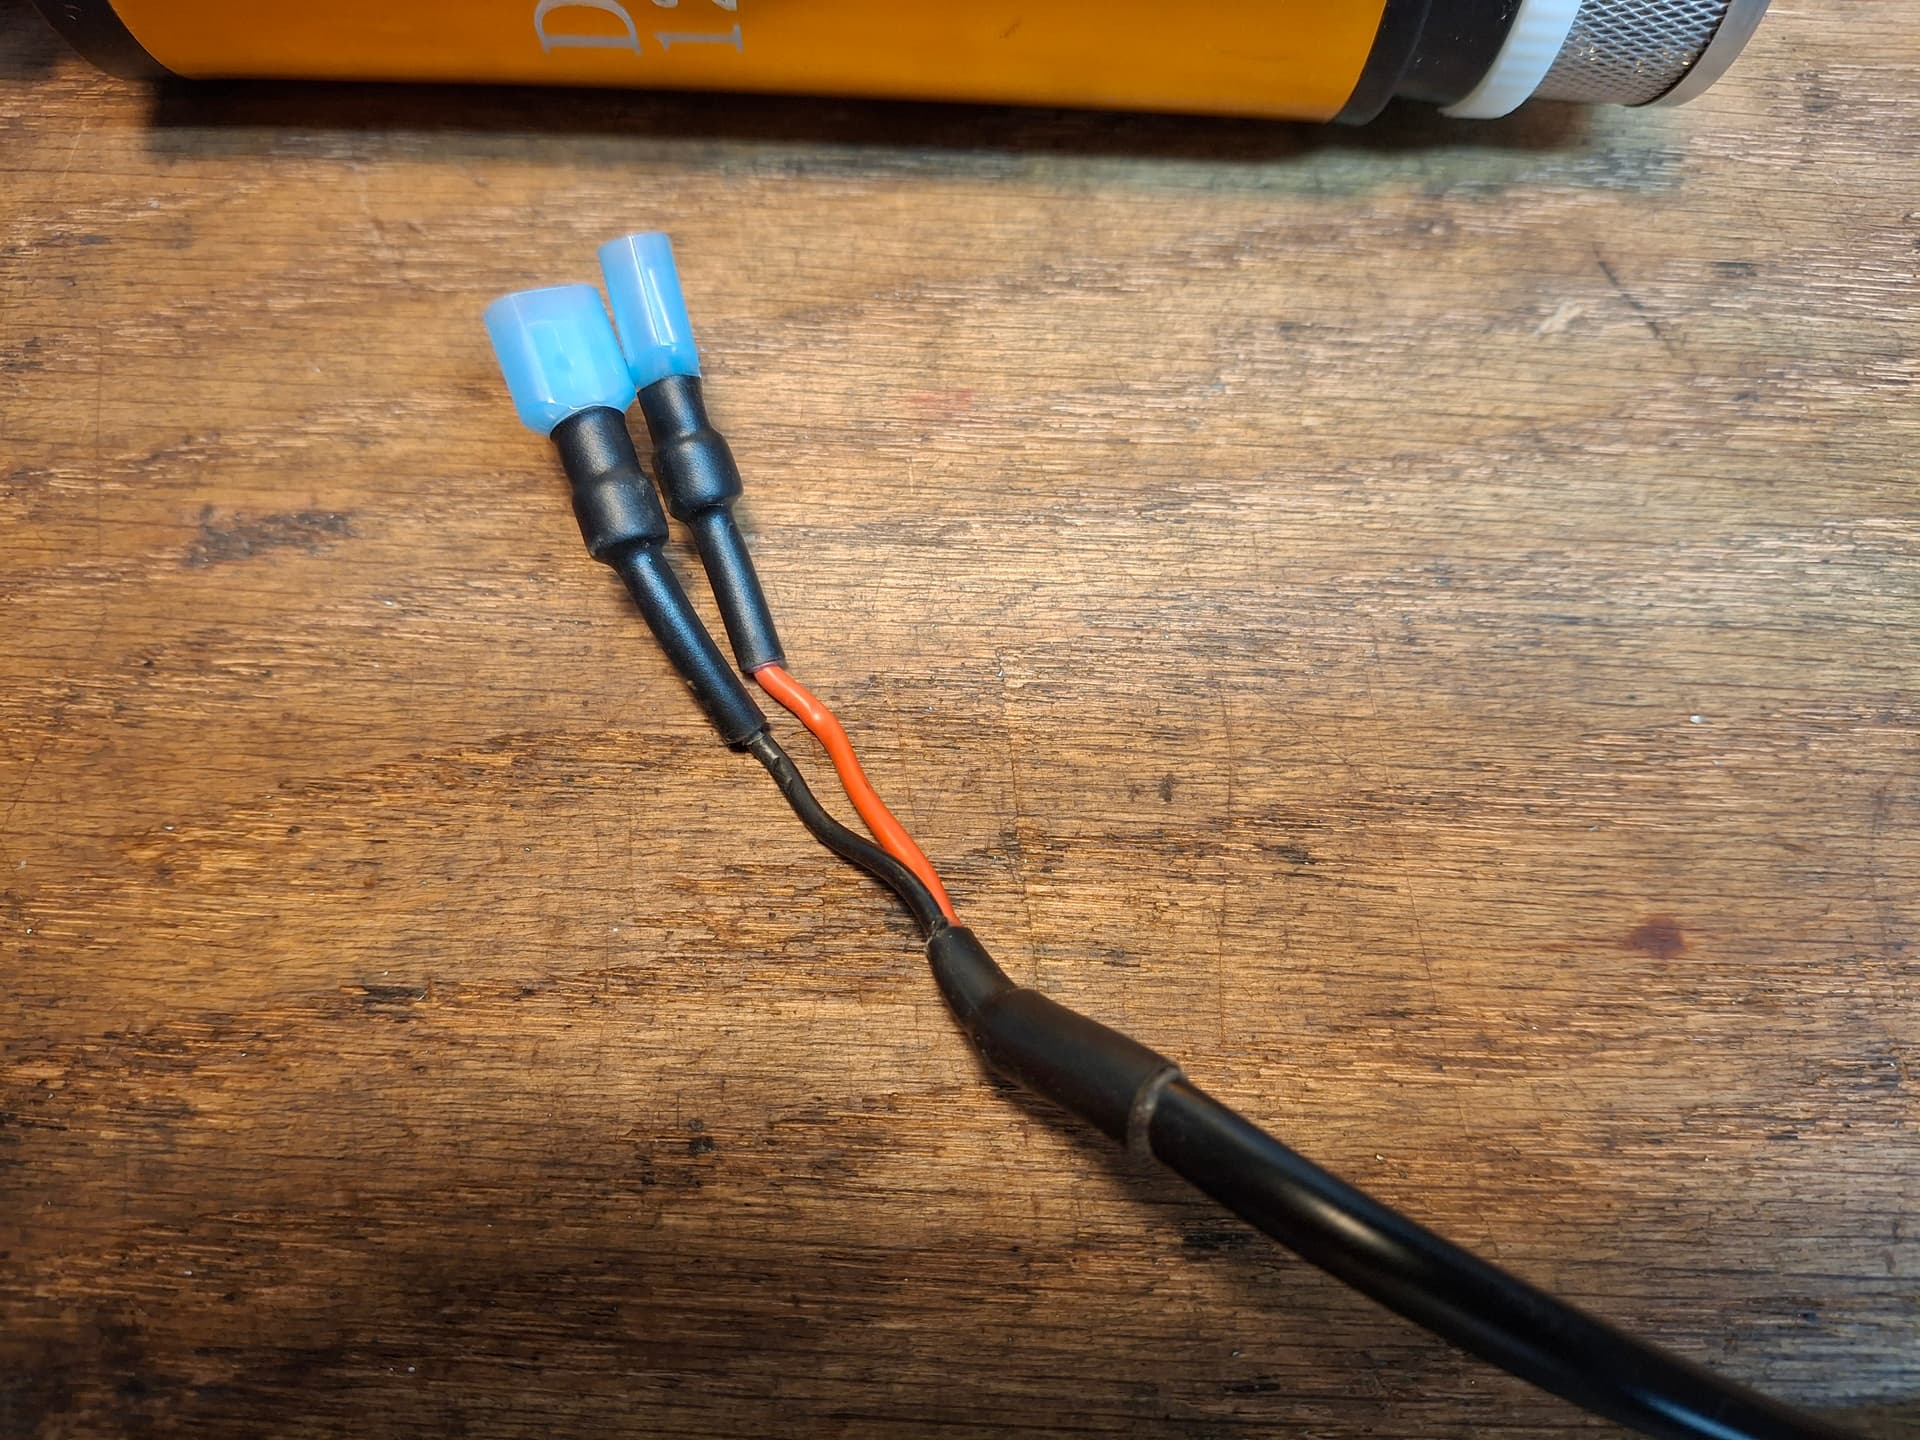
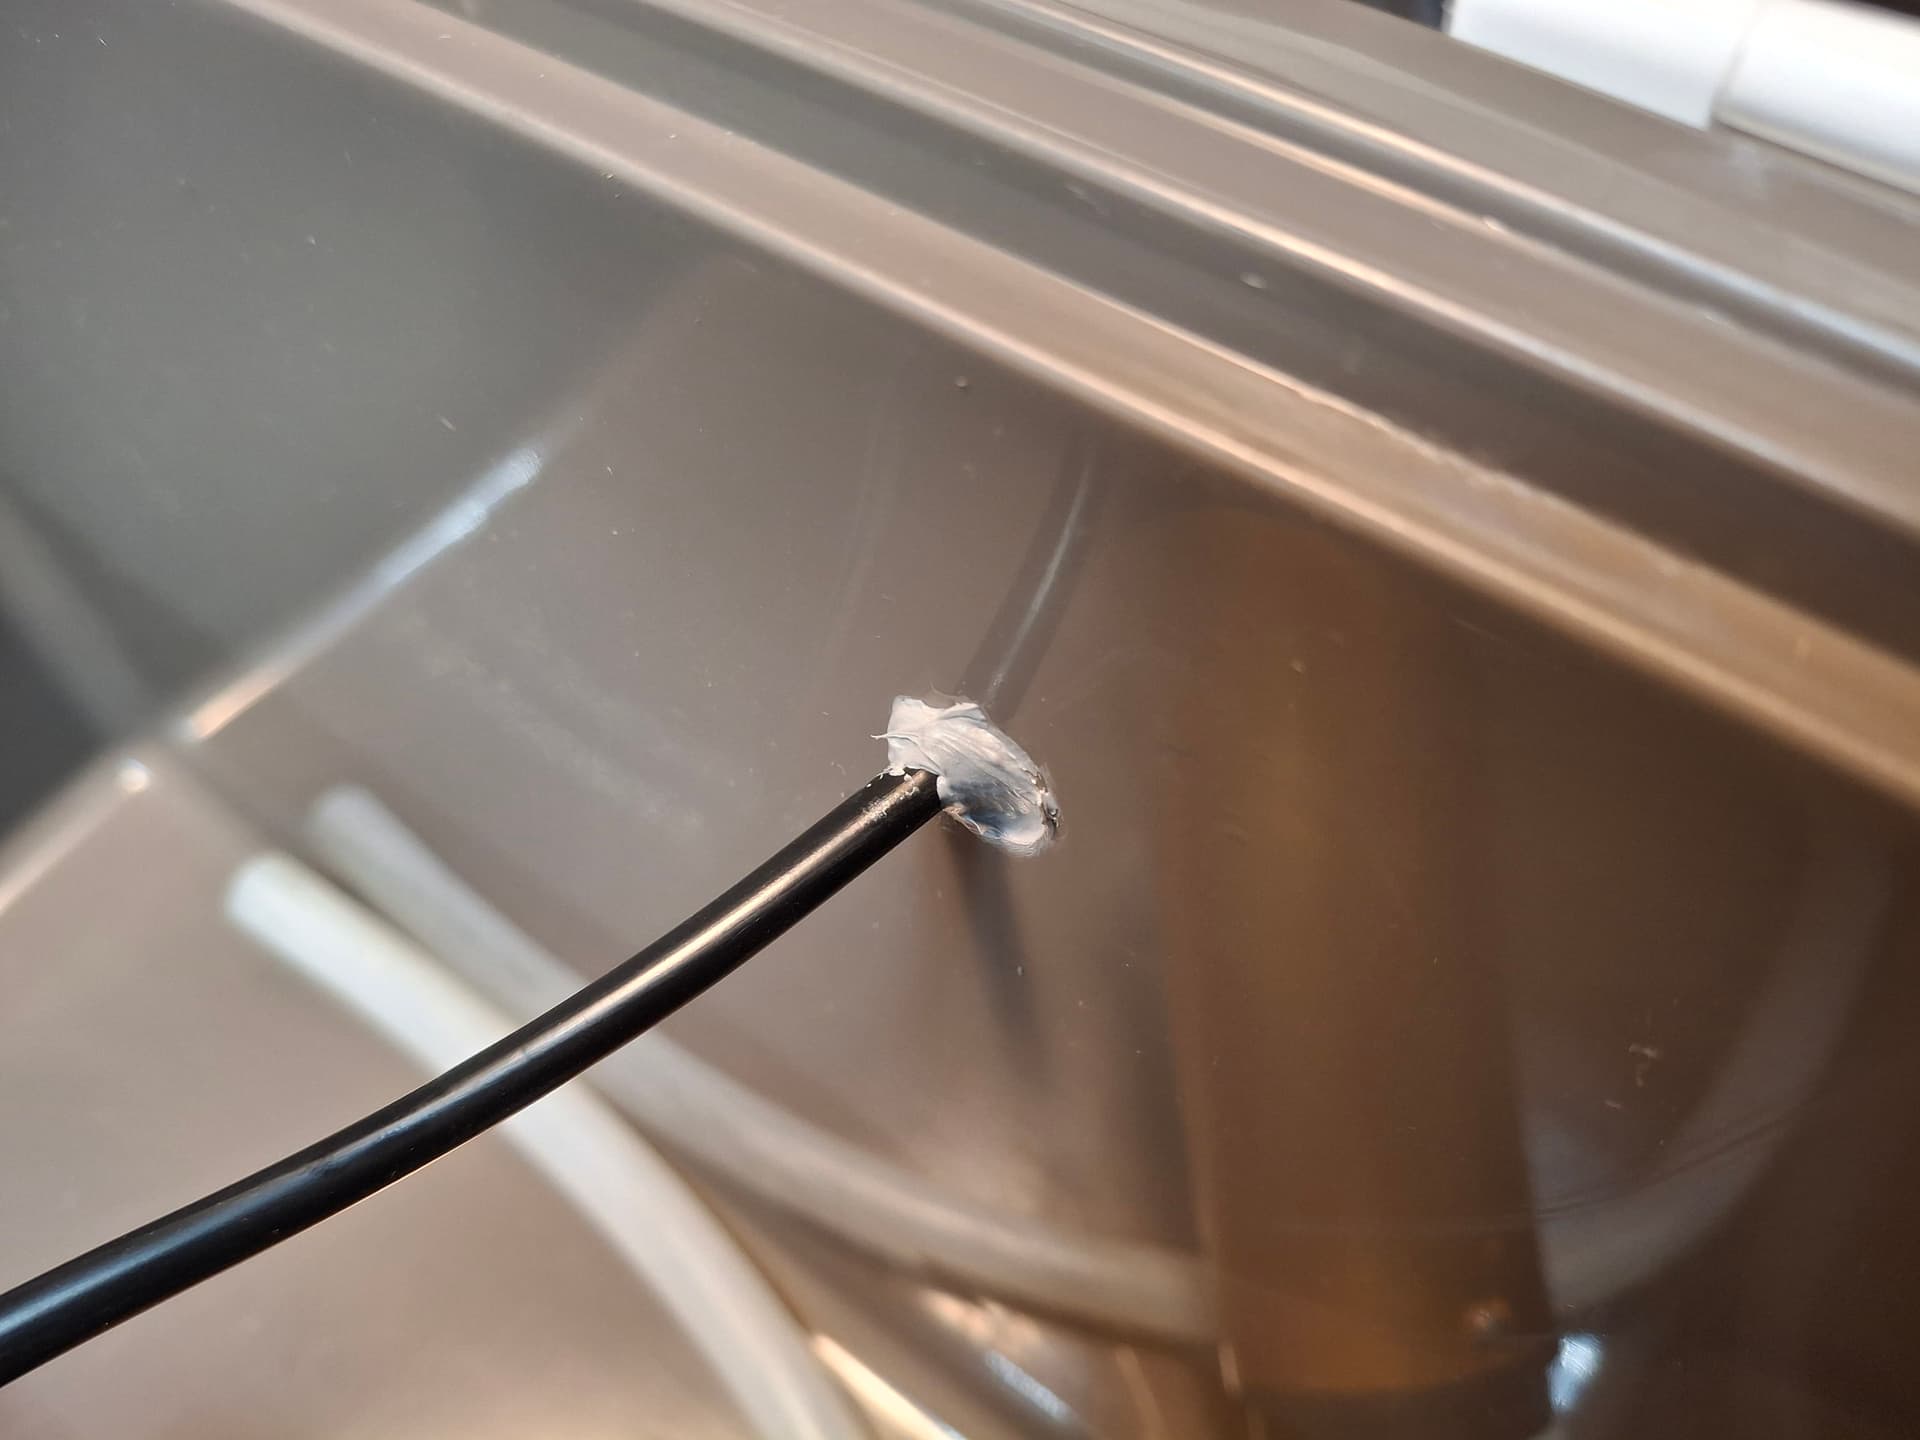
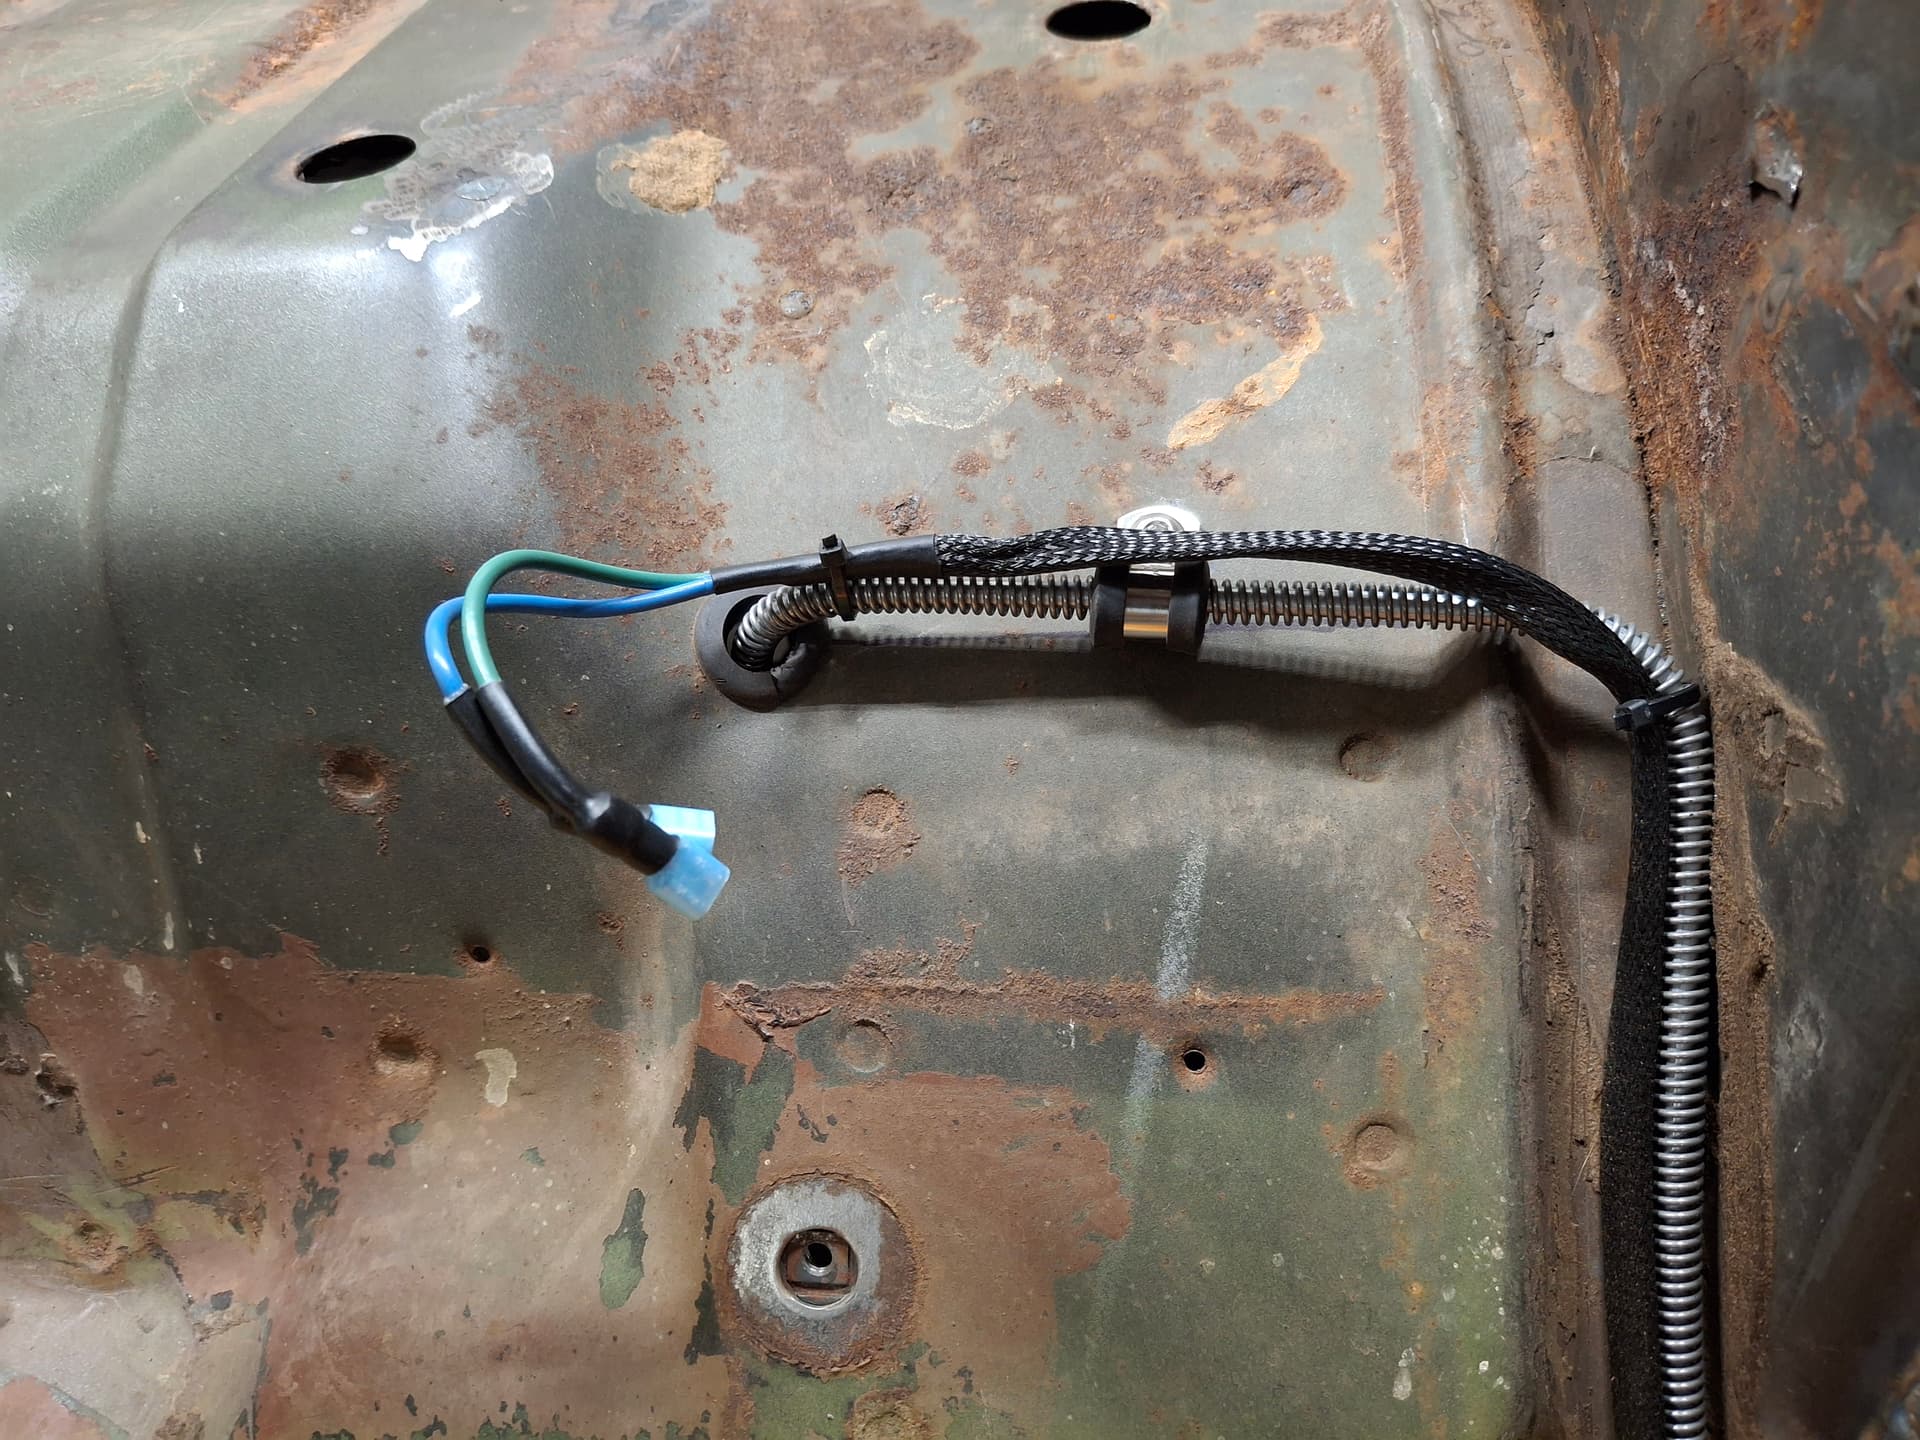
I cut the ends off the pump and installed insulated male spade connectors; the car wiring harness will use insulated female spade connectors. I fed the connectors one-by-one through the hole in the cooler and sealed the hole with silicone.
Car Wiring
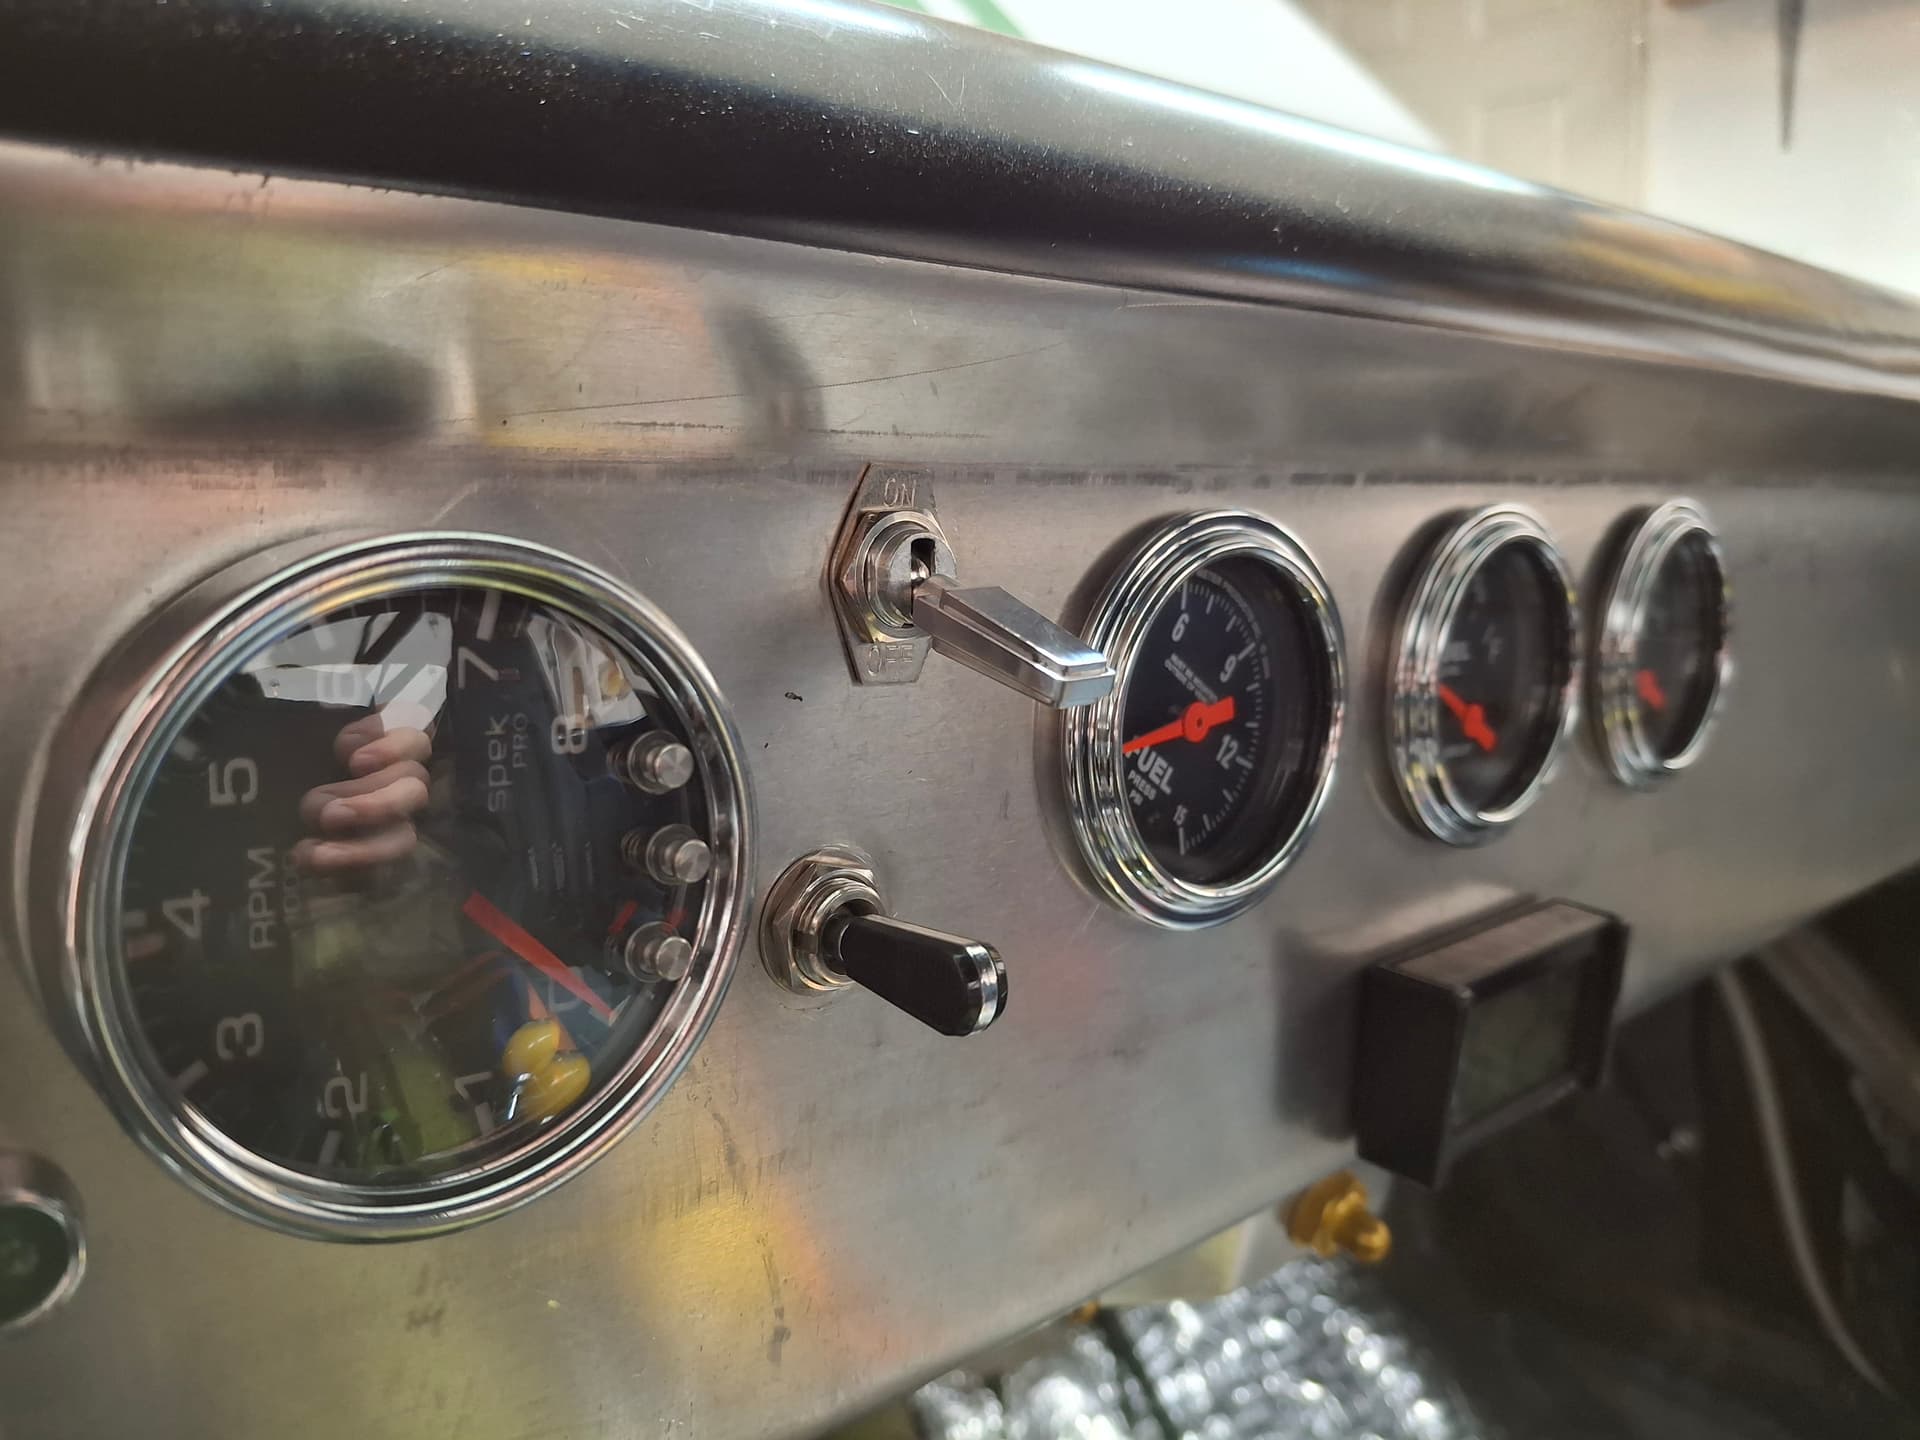
I mounted a toggle switch in the dash and the PWM on the left kick panel. I ran a feeder wire from the fuse panel protected by a 10A fuse to the toggle switch and from the switch to the PWM. I ran a negative from the body ground bar to the PWM. I ran a hot wire from the PWM to the to the pump where I connected them with spade terminals. I ran a ground wire from the PWM to the pump where I connected them with spade terminals. With this setup, I use the toggle switch to turn the PWM and pump on and off and the PWM to adjust the pump flow on the fly.
(silver toggle is the pump switch)
Suit Hose
I cut the male quick-disconnect ends off of the hose assembly, cut some of the insulation back, spit the insulation about 4" down, and pressed the hoses directly onto the elbow barbs. I zip-tied the installation to stop it from separating further. I marked the female socket at the shirt connection with a black band for the pressure side to make draining quicker since. I secured the hose along the drive shaft tunnel leaving enough slack for me to make an easy connection to the shirt. For draining the cooler, I took one of the male quick-disconnect fittings I cut off and pressed on a length of 1/4" PVC tubing. Once the ice is melted, I simply connect the male quick-disconnect to the return line of the shirt hose (the one I left unmarked), run the 1/4" hose out of the car door onto the group, and start a syphon. Gravity takes care of the rest until the water level is low enough for me to add more ice or until the cooler is dry for storage. Alternatively, I can connect the drain hose to the pressure line and use the pump to empty the cooler.
In Use
I tested the prototype at the August HPR with 102° on Sunday, although without the permanent mounting tray (I had the cooler temporarily strapped down with two ratchet straps). The system worked great, and I never once thought about my body temperature the entire weekend. By comparison, the weekend before I ran an afternoon shakedown session at HPR when it was 96°, and I was terribly overheated and distracted by my body temp.
One thing I noticed that is worth considering is that I found the best cooling with the PWM set at 75% to 100%, so I’m not sure the PWM is even worth it or if straight power would be the way to go. Granted, 102° is far hotter than most of our races, so I’m curious to see if an 80° to 90° weekend will only need 50% on the PWM to help prolong the ice’s life. I’ll report back with my findings at cooler ambient temps.
I’ll post more once I have the tray fabricated and installed.
Post Alert:
@jonUU
@Sportsracer
@Datsun78
@Bob_Alder
@Rich
@Nick_H
@jackson_prime101
@Raybob9289